.
.When you create a production phase, it appears in the tabular area as a phase called Production. For a single packaging box, you can create more than one production phase.
To generate production phase
.The Production Phase Generation Wizard opens at the Select Folding Type step. At this step, you select a type for folding the box. The available types provide various models of folding, and you choose the one that most closely resembles the box for which you want to generate a production phase. The production phase for your box will use the pre-defined folding actions for the selected box type.
IMPORTANT: You can generate a production phase only for the types of boxes that you see in the left-hand list.
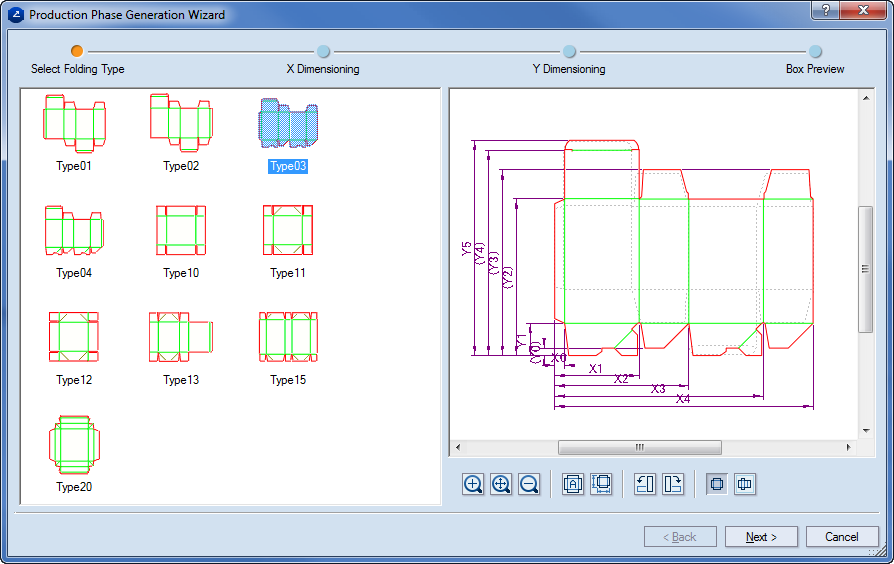
Selection area A list of the available folding types.
Preview area Visualizes the folding type selected in the selection area. The various horizontal and vertical dimensions indicate the available folding places in the type of box you have selected. They correspond to the box's creasing lines, on which folding takes place. The box design that will be folded appears in the background, in pale grey dotted lines. You can alternate viewing the folding type and the box design by using the preview switch buttons.
 Automatically choose the correct type When the button is pressed in, the correct type is selected automatically.
 Automatically set the measure lines Places the measure lines according to a predefined algorithm.
 Rotation buttons Rotate the box's preview counterclockwise or clockwise. When you rotate the box, you can compare it with the selected folding type.
Preview switch buttons Switch between the preview of the selected folding type  and that of the box
  for which you are generating a production phase. Clicking Show folding type displays the folding type, with the design of the box visible in the background. Clicking Show design displays the box, and the folding type is visible in the background.
The selected folding type and the box design appear in the preview area.
. To view the box design, click Show design .The Production Phase Generation Wizard opens at the X Dimensioning step. At this step, you select the vertical creasing lines at which the folding of the box will take place. The available folding places are indicated in the right-hand area.
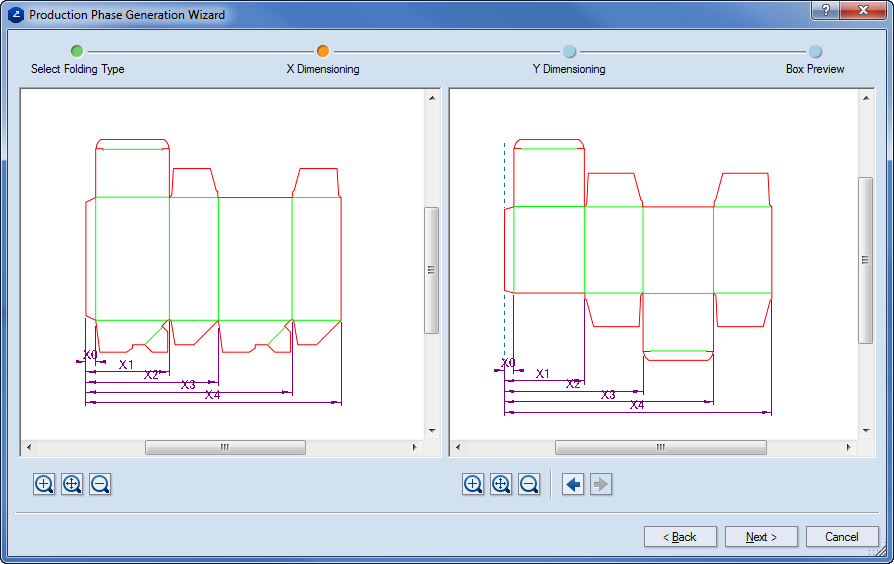
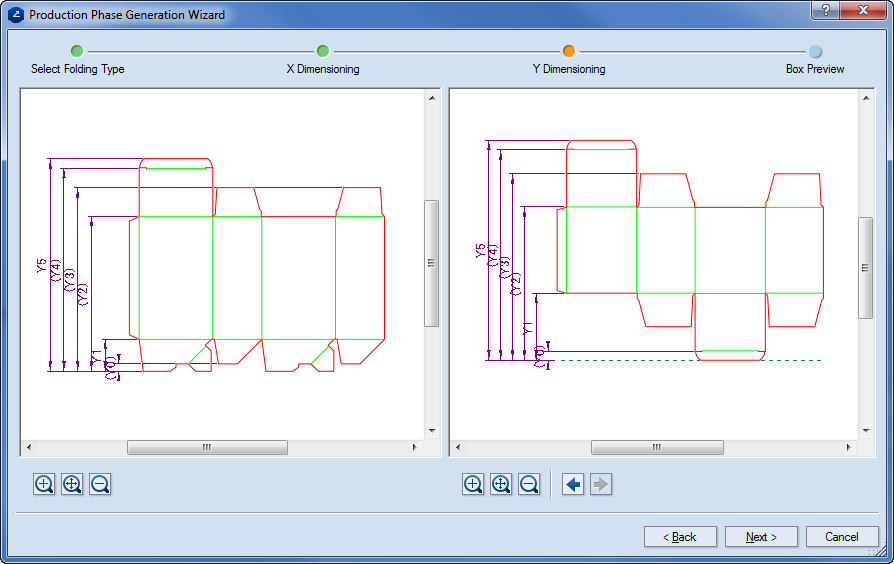
The Production Phase Generation Wizard opens at the X Dimensioning step. At this step, you select the horizontal creasing lines at which the folding of the box will take place. The available folding places are indicated in the right-hand area.
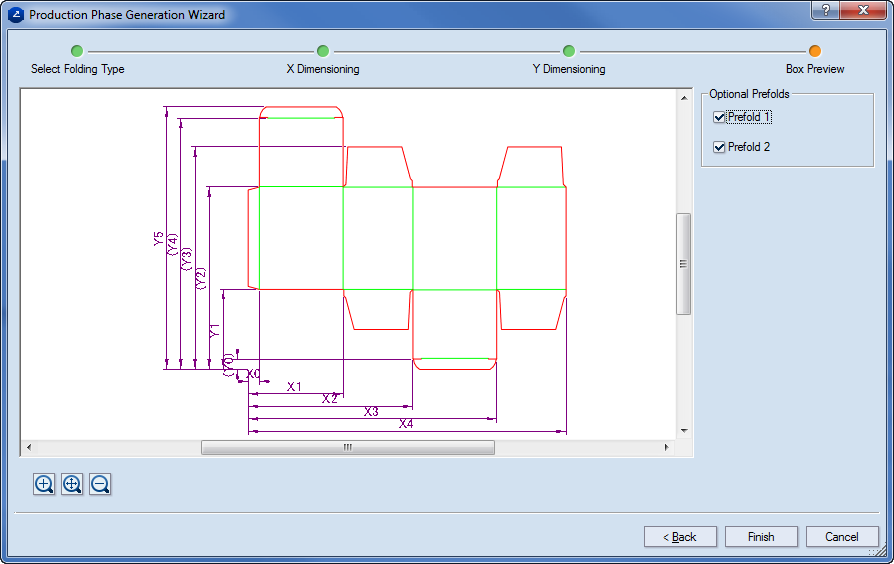
The Production Phase Generation Wizard opens at the Box Preview step. At this step, you preview the folding lines for the box. At this step, you can set prefolds for the box.