In this video, we create a folding sequence of how to combine two different designs: a number of boxes that need to be carried in a corrugated cardboard box.
Video: Combining designs
Click the icon to watch the video. Running time: 1:42 min.
PROCEDURAL STEPS
Having 0449 Display Tray with Self-Locking Wall.evr open, insert the EVF11001 Reverse Regular Tuck Lock.evr: on the 3D Presenter toolbar click Insert Part.
In the Select Inserted Part Side dialog box that appears, click the lower panel, and then in the graphical area click the box's bottom.
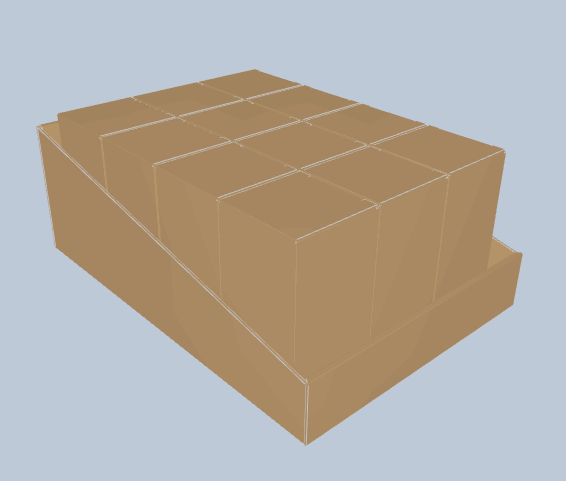
In the Folding part properties dialog box that appears, click the Array Transformation tab, and under X Axis, click As many as possible; in D1, enter 3.
Under Y Axis, click As many as possible; in D1, enter 3.
In the Folding part properties dialog box that appears, click the Alignment tab.
In the Alignment with Base Part, click Align to Rear Side.
In Z Offset, enter 3.
Click OK.
In the tabular area, right-click the Usage step, and then click Insert step below on the context menu.
In the Edit phase dialog box that appears, enter Move Down as the name of the new phase.
For Step 1 of the Move Down phase, in the graphical area click the array of boxes, and then on the contextual edit bar, in Action select Perpendicular Move; in Distance enter –300.
 .
.