Drawing multi-part structures in a single drawing (Master Canvas)
With Master Canvas you can draw multi-part structures — for example,
displays or furniture — in a single drawing. You draw all the components
of the structure in one drawing. Then you separate an individual component
in its own drawing, in which you can add further modifications — for
example, articles and 3D representations.
Working on a Master Canvas project involves three steps:
- Creating a Master Canvas in the project.
- Sketching the parts that you need.
- Converting the sketches into Master Canvas 1ups.
- Creating production-related drawings such as layout, 3D, bridges
drawing, and so on.
I. To create a blank Master Canvas
Method I: When you start a project, you can convert the initial
blank drawing into a Master Canvas
With this method, you start by creating
a project from scratch, and then upgrade it to a Master Canvas.
- Do one of the following:
- Click New project
 .
.
- On the File menu, click New.
- Press CTRL+N.
A blank drawing appears.
- Right click the drawing's tab, and then click Convert to
Master Canvas.
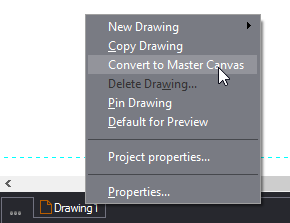
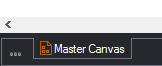
The drawing is now a Master Canvas.
- Start sketching in the drawing or import
drawings.
Method II
This method you create a new drawing of type Master Canvas.
- Right-click the lower border and then click Create Master
Canvas.
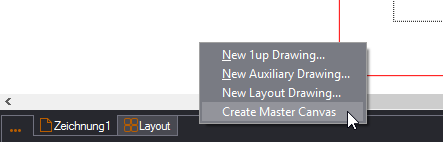
This creates both an empty Master Canvas and
an empty drawing.
top of page
II. To upgrade an existing drawing to a Master Canvas
You can choose to make the drawing you are currently working on
into a Master Canvas project.
You cannot convert to a Master Canvas a 1up drawing:
- From a design you have loaded from the Library of Resizable
Designs.
- That takes part in a layout or one that has its own 3D drawings.
In such a case, delete the non-1up drawings, and then proceed
with the conversion.
- Right click the drawing's tab, and then click Convert to
Master Canvas.
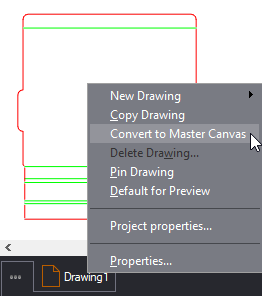
The drawing is now a Master Canvas.
top of page
III. What you can do in a Master Canvas
Once you have a Master Canvas drawing, you can:
- Sketch designs and convert them to 1ups in order to create
3D model or layout drawings.
- Drag available 1ups drawings into the Master Canvas.
top of page
1. Converting sketches into 1ups
After you have sketched your parts or otherwse populated the Master
Canvas, you need to convert the parts into 1ups.
- Select a sketch.
- Right-click, and then click Convert to 1ups.
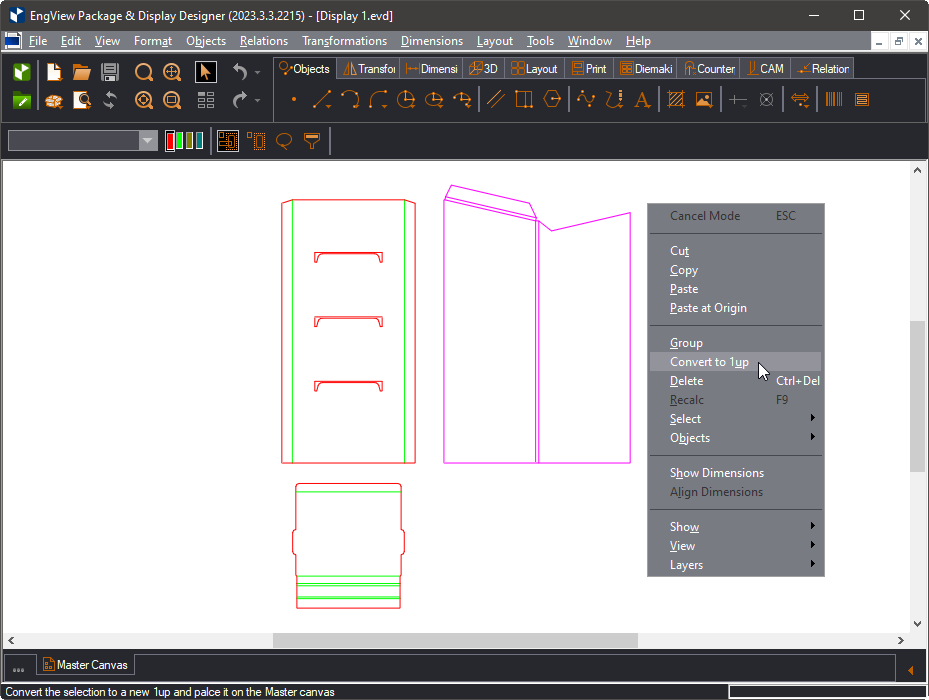
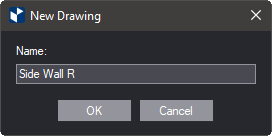
- In the New Drawing dialog box that appears, type a name for
the new drawing, and then click OK.
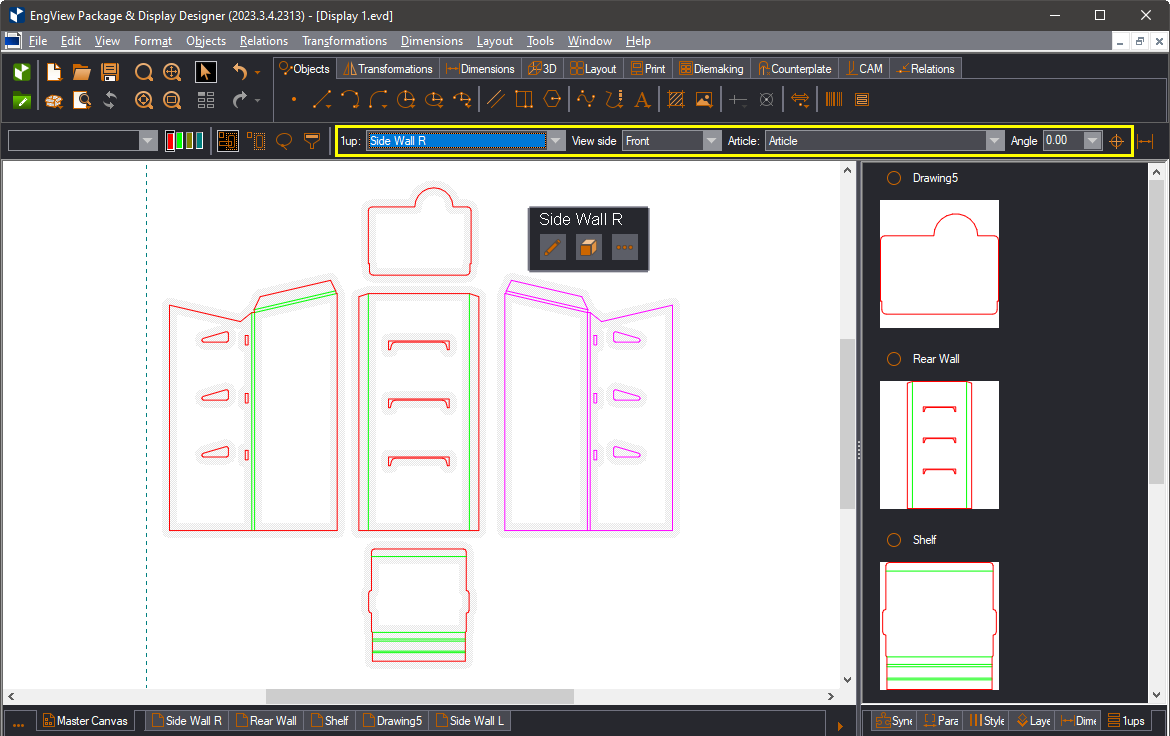
After you click OK, the following occurs
(pictured):
- EngView
creates a separate drawing from the sketch (1). You can use this
drawing as a normal 1up drawing and create, for example, a 3D
drawing from it.
- The sketch now appears as a 1up and is outlined in the graphical
area (2). The outline is a visual indication that the earlier
sketch is now a 1up that has its own drawing.
- In the tabular area, the drawing is now listed in the 1ups
tab (3).

- Repeat Steps 1–3 for all the sketches that you want to convert
to 1ups for the purposes of the final structure.
2. Drag available 1up drawing of the project into the Master Canvas
top of page
1up Actions
Copying a 1up (make a replica of the
1up)
You can use a replica of an available 1up and use it as a reference
during drawing a detail. For example, the hole in the side panel must
be as wide as
To make a replica of a 1up, drag the 1up from the table on the right
and position it where it is needed
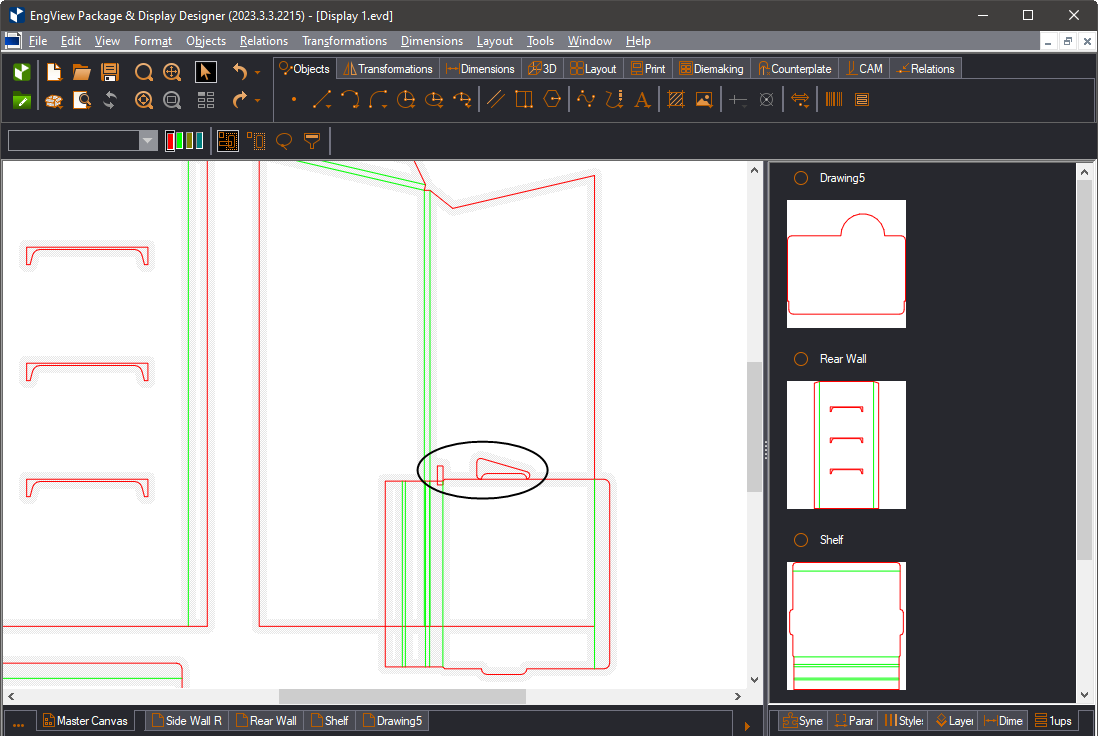
The place and the size are drawn relative to the shelf.
You can delete a replica when it is no longer needed.
top of page
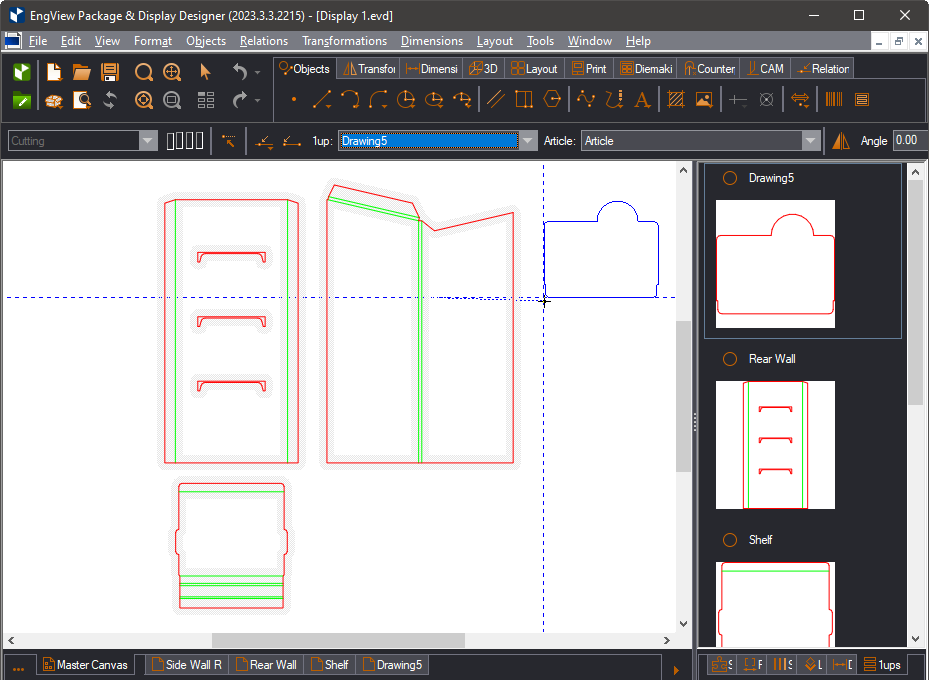
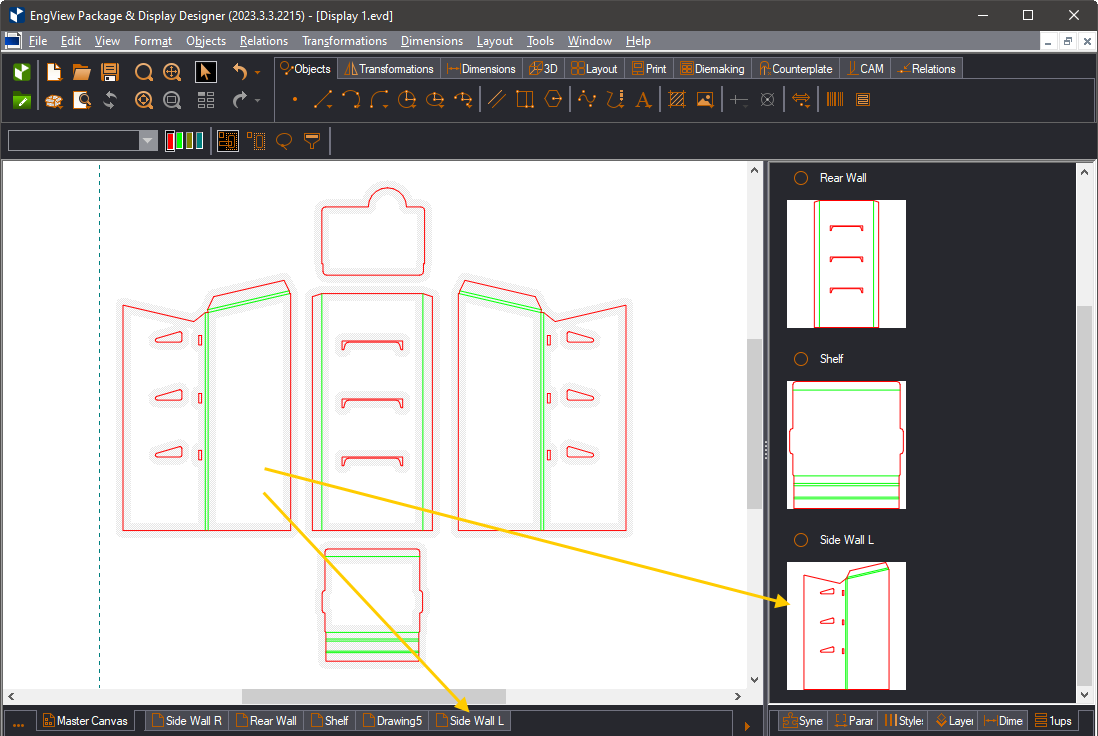
Cloning a 1up
You can clone a 1up, which creates a new drawing. For example, if
the right-hand wall of a display has already been drawn, you can clone
it to create a 1up drawing for the left-hand side. You can use the
mirror transformation to achieve precise cloning.
- To clone a 1up, right-click it, and then click Clone
on the context menu.
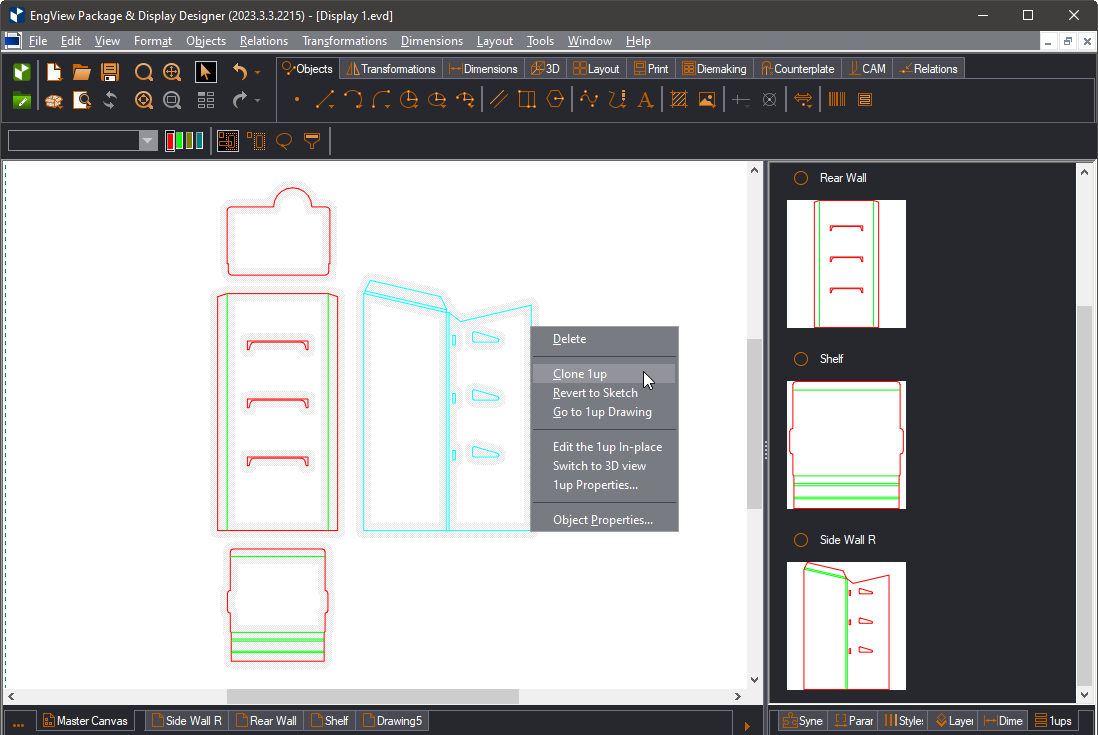
After you click Clone, a blue cloned
sketch of the cloned drawing appears and follows the mouse pointer
(pictured).
NOTE: While the cloned sketch is still following
the mouse pointer in the graphical area, you can use the contextual
edit bar to define the new drawing: in Drawing name, type a
name; in Article, click and select an article for the drawing;
in Flip Part  , mirror the 1up to
position it as a mirror image of the original 1up.
, mirror the 1up to
position it as a mirror image of the original 1up.
- Position the cloned sketch where you want it to be.
The new drawing is created automatically from
the cloned 1up.
top of page
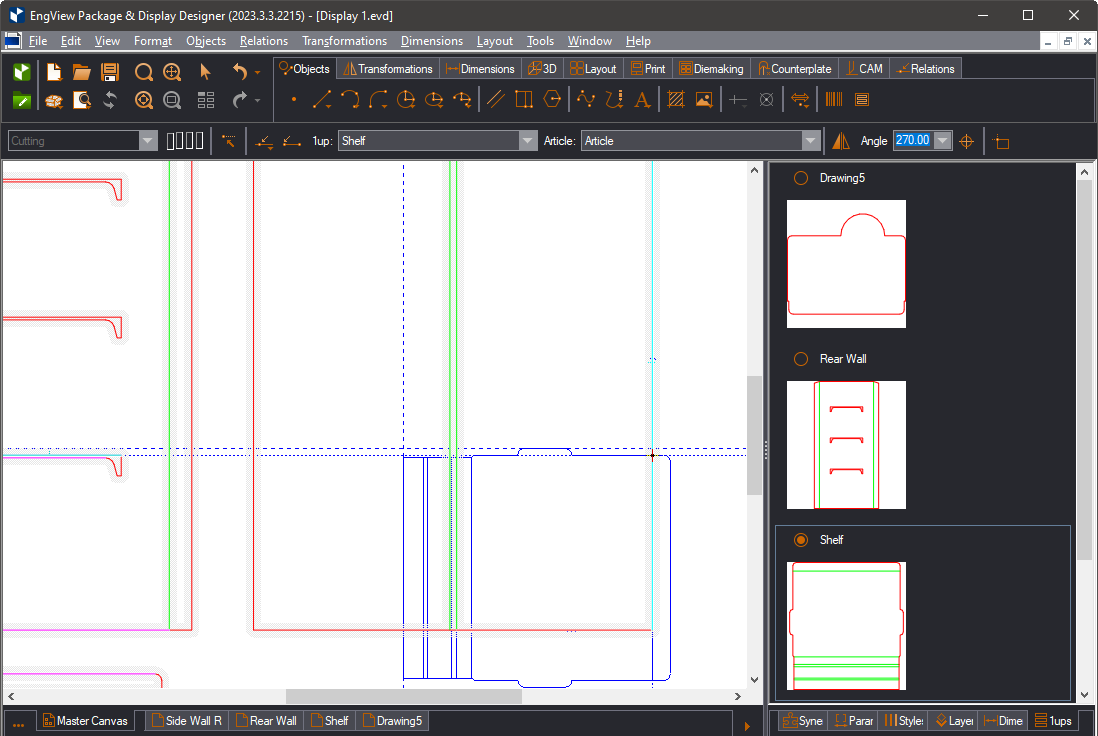
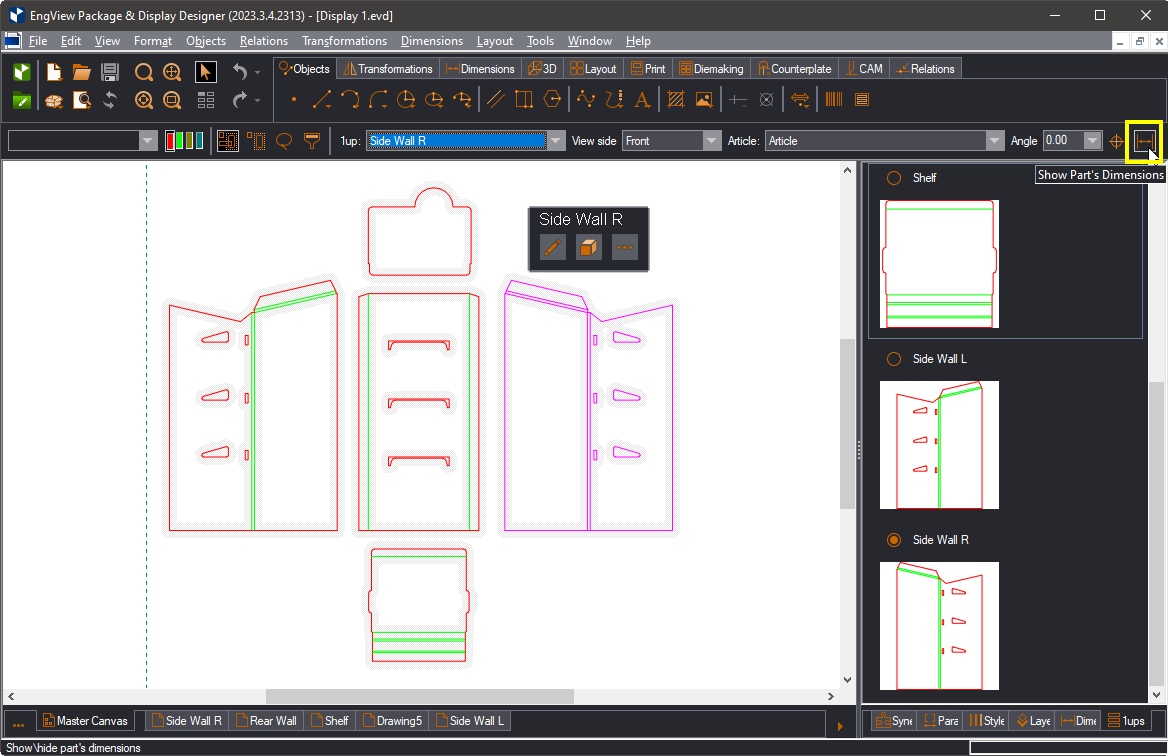
Viewing dimensions
Parts' dimensions are not displayed by default.
To view them, select the part, and then click Show 1up Dimensions
on the contextual edit bar.
top of page
Viewing dimensions of all parts
You can switch at once on the dimensions of multiple parts in the
Master Canvas: Select the parts whose dimensions you want to view,
and then click Show Part's Dimensions on the contextual edit
bar.
top of page
Hiding dimensions
To no longer view the dimensions of a part or multiple parts, select
the part or parts, and then click Show Part's Dimensions on
the contextual edit bar.
top of page
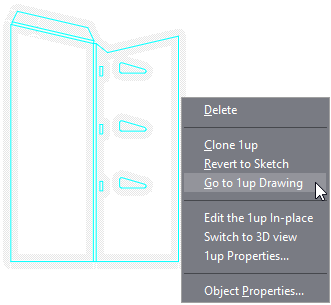
Opening a 1up's own drawing
While in the master canvas, you can go to 1up's
drawing wither by clicking its tab or by right-clicking the 1up, and
then clicking Go to 1up Drawing.
 top of page
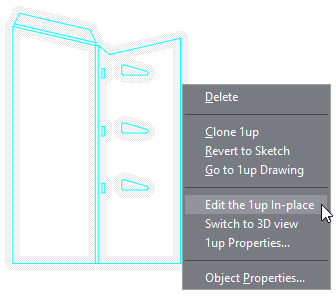
Edit in place
You can begin editing a part directly in Master Canvas rather than
in its own drawing. To do so, right-click the part, and then click
Edit 1up in Place on the context menu.
 top of page
Switch to 3D
To create a 3D representation of a part or edit already created
3D:
- Select the part and click the
 button
- Right-click it, and then click Switch to 3D View on
the context menu.
If the part already has a 3D drawing, EngView
takes you to it.

top of page
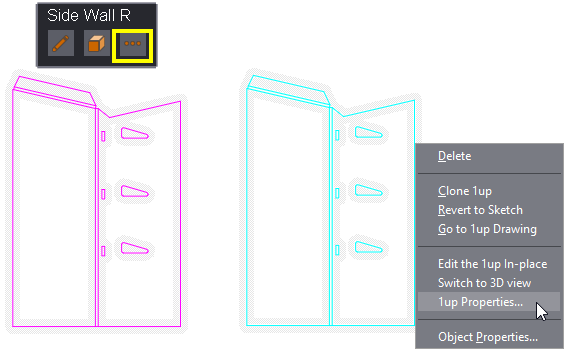
Edit 1up drawing properties
To inspect the general
properties of the drawing behind a part:
- Select the part, and then click the
 button.
- Right-click the part, and then click 1up Properties
on the context menu.
top of page
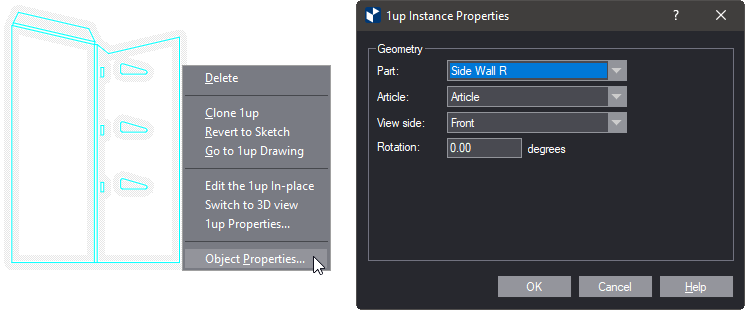
Editing part's spatial positioning, view side, and articles
You can inspect the positioning, view side and the article applied
onto a part. To do so, right-click it, and then click Object Properties
on the context menu.
top of page
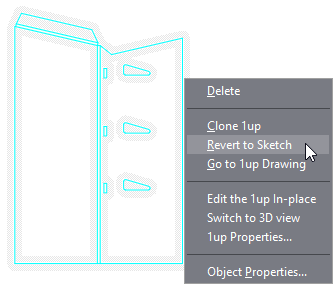
Reverting a 1up to original sketch
If you no longer need a 1up but want to preserve the sketch it originated
from, you can revert the 1up to the sketch. Right-click the 1up, and
then click Revert to Sketch on the context menu.
 top of page
 . You can modify
the drawing either in the master canvas or in its own drawing.
The modifications you make in either drawing appear automatically
in both drawings.
. You can modify
the drawing either in the master canvas or in its own drawing.
The modifications you make in either drawing appear automatically
in both drawings.