Filling enclosed regions in a 1up
You can fill an enclosed area in the graphical area with a:
- Single fill. It hatches the enclosed area with a single array of parallel lines of a certain color, slanting against the x-axis, and arrayed at equal spacing.
- Cross fill. It hatches the enclosed area with two crossing arrays of parallel lines of a certain color, slanting against the x-axis, and arrayed at equal spacing.
- Pattern fill. It fills the enclosed area with a user-defined pattern. The default pattern for this mode is in a solid color.
NOTE: An enclosed area is a discrete area of a 1up that is fully closed in by one or a series of connected geometric objects. Alternatively, an area can be enclosed internally by an object — for example, a circle may be enclosing another circle.
The contextual edit bar
During fill definition and when an existing fill is selected.

 For help on snapping, see Snapping objects.
 Starts the Detect Relations Manager.
The contextual edit bar may appear differently depending on the relations you have set.
Relative Dx and Dy during repositioning the fill by dragging.

Attributes
- Color Appears as a list in the contextual edit bar. Provides the main colors and an option for setting a custom color.
- Fill Pattern Three fill patterns are available: Single Fill
 , Cross Fill
  and Pattern Fill
  .
.
- Angle (single and cross fills only). The angle of the slanting lines of a single fill pattern or of one of the slanting line arrays in a cross fill pattern against the x-axis. Appears as Angle in the contextual edit bar. For help on using the new, Select Quadrant button
 on the contextual edit bar, see Automatic computation of angles.
- Spacing (single and cross fills only). The width of the empty strips between the parallel slanting lines in a single fill and cross fill.
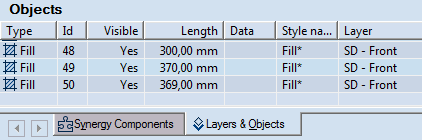
- Length This is the circumference of the filled area. It can be a single object or a series of objects that enclose an area. Appears in the Length column in the tabular area.
- Style The default style is Fill. For details about styles, see Formatting styles, colors and templates.
- Id A unique, system-generated object identification number. Appears in the Id column in the .
Control points
A fill has one control point, which is the place where you click to apply the fill. The location of the control point defines if the fill should be applied or not, that is a fill is applied only when the fill control point is in an enclosed area. If the fill control point is outside an enclosed area, the fill is neither deleted nor modified, but is not applied.
NOTE: When two or more fill control points are in the same enclosed region, the latest drawn fill takes precedence over the previous ones.
Tabular presentation
When you apply a fill, its object type, Id, the perimeter of the filled area, and its style are recorded in the Objects tab in the tabular area.
NOTE: The data in Objects tab is unavailable for direct editing.
To fill an enclosed area
- Do any of the following:
- On the , click Fill
 .
.
- On the Objects menu, click Fill.
- In the contextual edit bar, choose a fill type: Single Fill , Cross Fill or Pattern Fill .
- In the list, select a color for the fill.
- (Single and cross fills only) Set an angle against the x-axis for the lines of a single fill pattern, or of one of the slanting line arrays in a cross fill pattern. For cross fill patterns, the two crossing line arrays are perpendicular by default.
- (Single and cross fills only) Set the spacing between the lines in the arrays. For cross fill patterns, the here-set spacing is applied by default for both line arrays.
- (Optional) Set advanced pattern properties — the angle and spacing of the second line array in a cross fill, or the pattern of a pattern fill.
- To apply the fill, click anywhere inside the enclosed area.
- (Optional) To apply more fills, repeat Steps 2–7.
- To finish applying fills, right-click anywhere in the graphical area.
To select a fill
You can select a fill only in the tabular area. In the graphical area you can select a fill together with the objects that enclose it.
To modify a fill by changing its attributes
- Select the fill in the tabular area.
- In the contextual edit bar, enter attribute values, and then press ENTER.