Inserting images manually
You can define manually the place and the horizontal and vertical size of the image you insert by means of an auxiliary bounding rectangle that circumscribes the image. After you have opened the image file, define a bounding rectangle by click consecutively two cross-opposite points, and the image will be inscribed into it. Then you can drag the image to reposition it.
The contextual edit bars
Angle and absolute width and height in the process of insertion and when selected.

 For help on snapping, see Snapping objects.
 Starts the Detect Relations Manager.
Attributes
- Angle
 The angle of rotation of the image against the x-axis. Appears as Angle in the contextual edit bar. Learn how to use the automatic computation of angles.
- Absolute x and y. The coordinates of the image's control point. Appear in the Data column in the tabular area.
- Absolute width and height. These attributes are different from the absolute x and y and appear only on the contextual edit bar — either during inserting the image or when you select an image. They define the width and height of the image's bounding rectangle.
- Relative Dx and Dy. Appear on the contextual edit bar only during repositioning an image by dragging. Dx and Dy are the relative horizontal/vertical offset distances between the original and the repositioned image locations as projected on the coordinate axes. The Dx/Dy values are, respectively, the Ox/Oy coordinate position of the repositioned image less the proportional Ox/Oy coordinate position of the original image.
- Id. An automatically generated object identification number. Appears in the Id column in the tabular area.
Control points
An image has one control point, usually positioned at the lower-left angle of its imaginary circumscribing rectangle. Consider also the following:
- If you rotate the image, its control point might not be displayed as lower left, but in accordance to the rotation angle you specify.
- When two or more images overlap, the last inserted image takes precedence over the previous ones.
Tabular presentation
When you insert an image, its object type, system-generated Id number, absolute coordinates and its style (always Default) are recorded in the Objects tab in the tabular area.
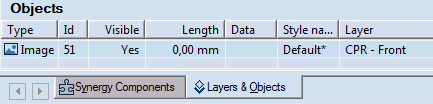
The data in Objects tab in the tabular area is not active for direct editing. For images, the value in the Length column is always 0.00.
To insert an image
- Do any of the following:
- On the , click Image
 .
.
- On the Objects menu, point to Images, and then click Image.
- Press CTRL+D+I.
The Insert Image dialog box appears.

- In Look in, browse to the image that you want to insert.
- (Optional) In File type, select the file type that you will use.
- To insert the image onto the design, click Finish.
To modify an image by changing its attributes
- Select the image.
- On the contextual edit bar, in Angle, Width and Height, enter the values, and then press ENTER.
NOTE: Learn how to do additional editing to an image.
To reposition an image by dragging
- Select the image.
- Do any of the following:
- In the graphical area, drag the image to where you want it to be.
- In the contextual edit bar, in Dx and Dy, enter offset distances relative to the original location of the image.
- Click to position the image.
Notes
- If the control point of the image coincides with a control point of another object, the image will be repositioned and the connected objects will be modified depending on the direction and distance at which you drag the image.
- During the insertion of an image via the Image mode or repositioning an image, when in the contextual edit bar you enter a value in one of the edit boxes (Angle, Width or Height, or Dx or Dy), and then move to the next edit box, the scope of the image rectangle preview will be limited according to the specified value. Consider the following example:
If you place the first point of the rectangle defining the image and then enter a value of 50 mm for Width and press TAB to confirm the value, when you point to define the second vertex point of the image, the rectangle preview is limited to the 50 mm Width value. To drag the image rectangle preview freely, in the respective edit box (Width or Height while inserting an image via the Image mode, or Dx or Dy while repositioning any image) and enter 0.00, and then press TAB to move to the next edit box.
The zero-value rule applies only for distance values.