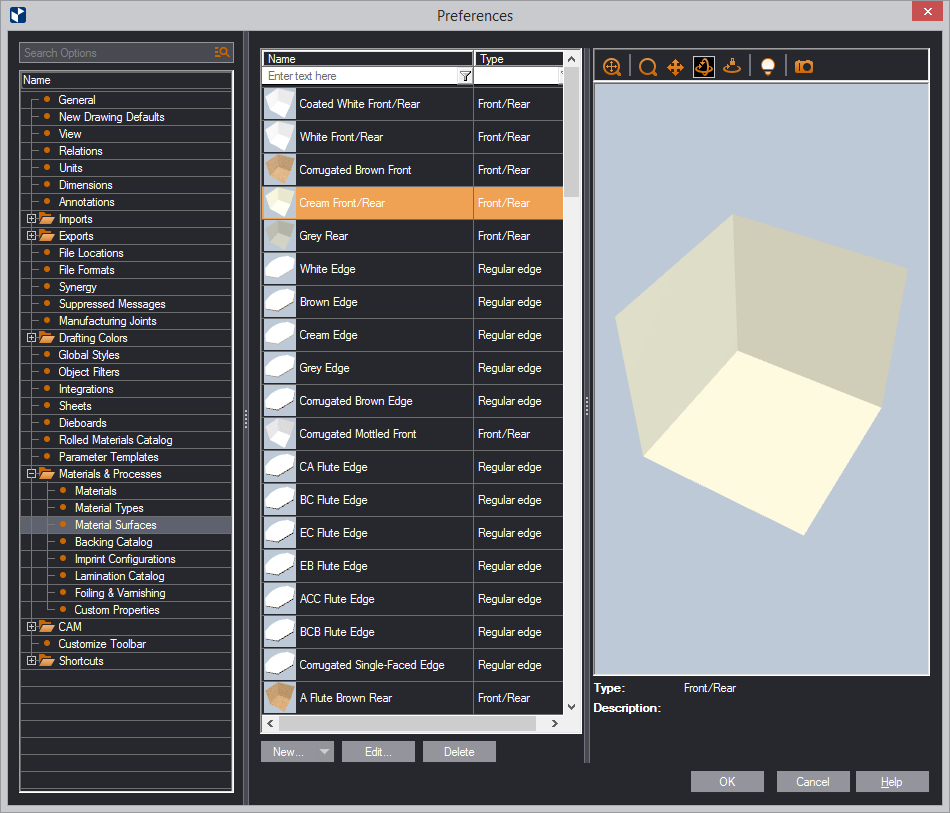
| Icon |
Control Name |
What It Does |
| |
Name |
Name of the surface appearance |
| |
Type |
Name of the appearance type |
| |
 |
Fit |
Fits the appearance model fit the preview area. |
 |
Zoom |
Starts zooming inside the preview area. |
 |
Pan |
Starts moving the appearance model across the preview area. |
 |
Turn |
Starts rotating the appearance model in the preview area. |
 |
Single Axis Rotation |
Starts rotating the appearance model along the axis defined
by how you move the mouse. |
 |
Set scene |
Opens a dialog box in which you can set how
the appearance model is lit in the preview area. |
 |
Snapshot Icon |
Makes a snapshot of the surface model in the preview area.
This snapshot then automatically appears as an icon for the surface
appearance in the catalog list. |
| |
| |
New/Clone |
Opens a dialog box in which you can define the properties of
a surface: colors,
texture, bump,
and PBR.
NOTE: Cloning an appearance is an effort-saving
definition technique in which you define an appearance by modifying
the settings of an existing one: In the list, select a appearance,
click Clone, edit the settings, and then save them under
a new name. |
| |
Edit |
Opens a dialog box in which you can edit the colors,
texture, bump,
and PBR of a selected
appearance. |
| |
Delete |
Deletes the appearance
that you have selected in the list. |
The new surface appearance now appears in the list.