Creating layout on a rolled material
The nesting job procedure that follows takes you through the steps
you need to take to create a layout by nesting
the parts of a structure on a rolled material. In nesting on a
rolled material, the material is fed not in sheets but in rolls. When
using rolled material, EngView
places the nested parts at the beginning of the roll (in its left
side), which leaves unused material on the right. As a result, after
a layout has been sent to production, you can use this leftover material
for future jobs. EngView
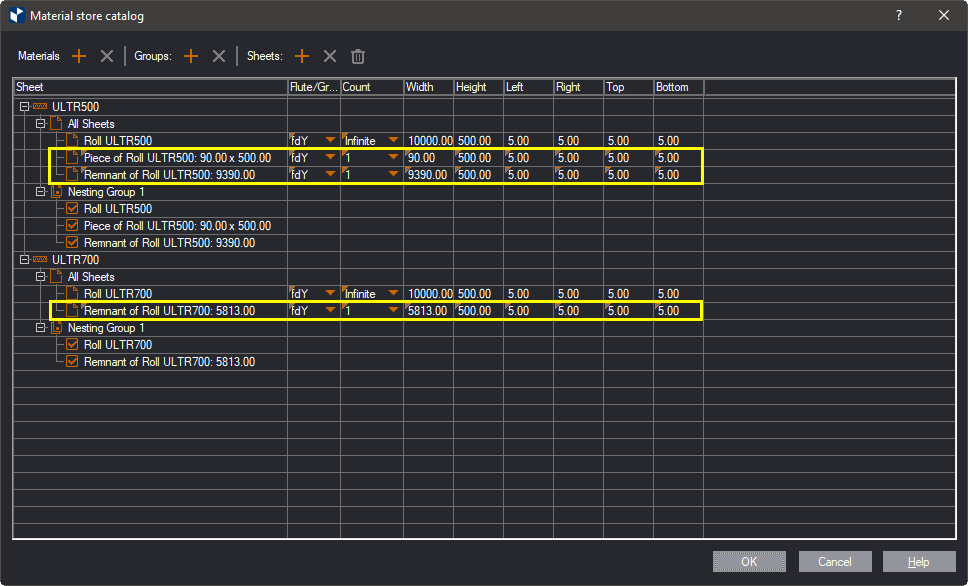
takes account of the leftover material and stores it in materials
store.
top of page
Creating a rolled material
EngView
treats as a roll any material whose length is at least five times
greater than its height.
The procedure that follows starts from the the assembled state of
a structure, in its respective drawing.
Defining the material
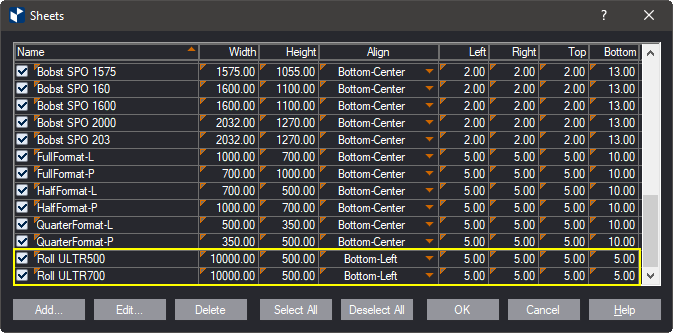
- Start by defining a rolled material. You do this in the program's
sheets catalog: On the Format menu, click Sheets.
The Edit Sheet dialog box appears.
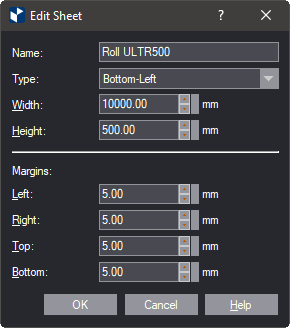
- In Width, set how long the roll will be; in Height,
set how high it will be.
An example
Let us take a look at an example.
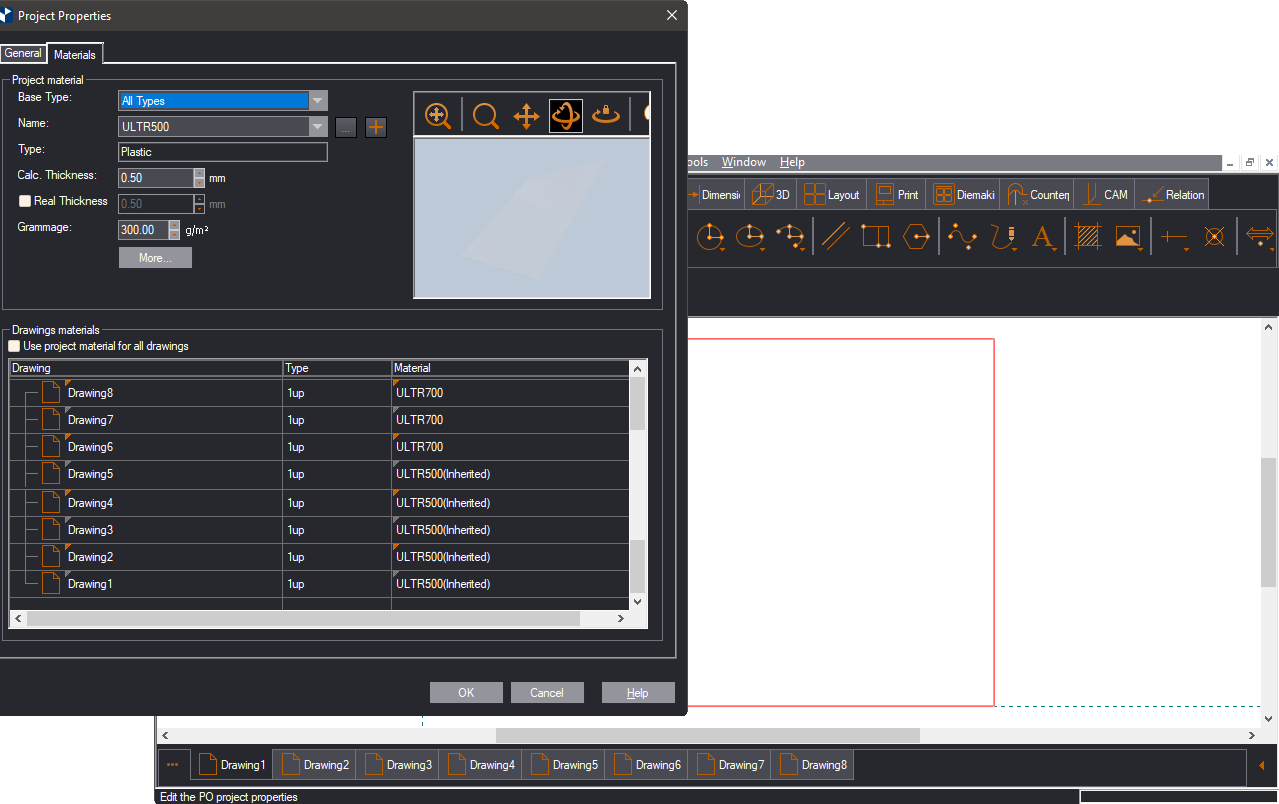
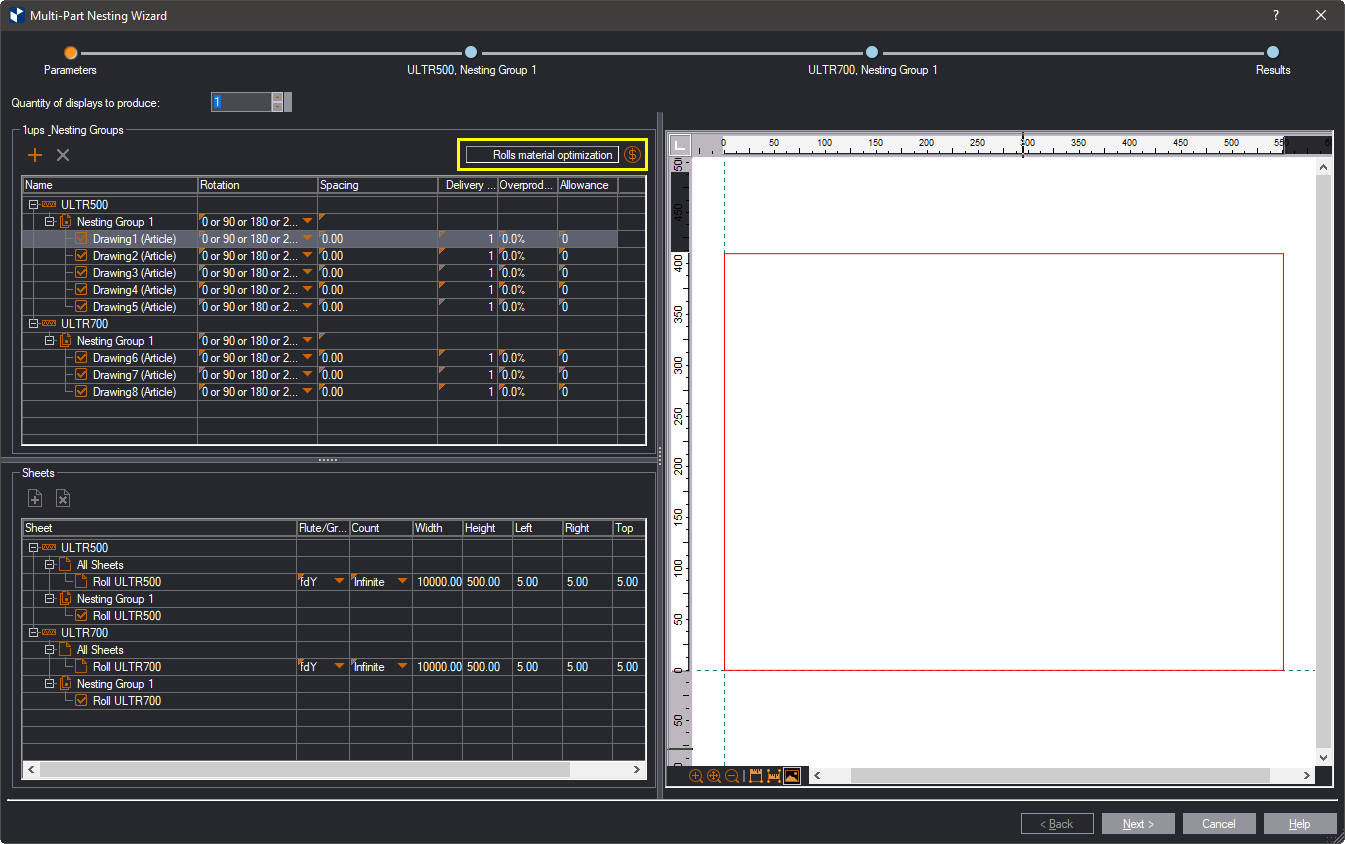
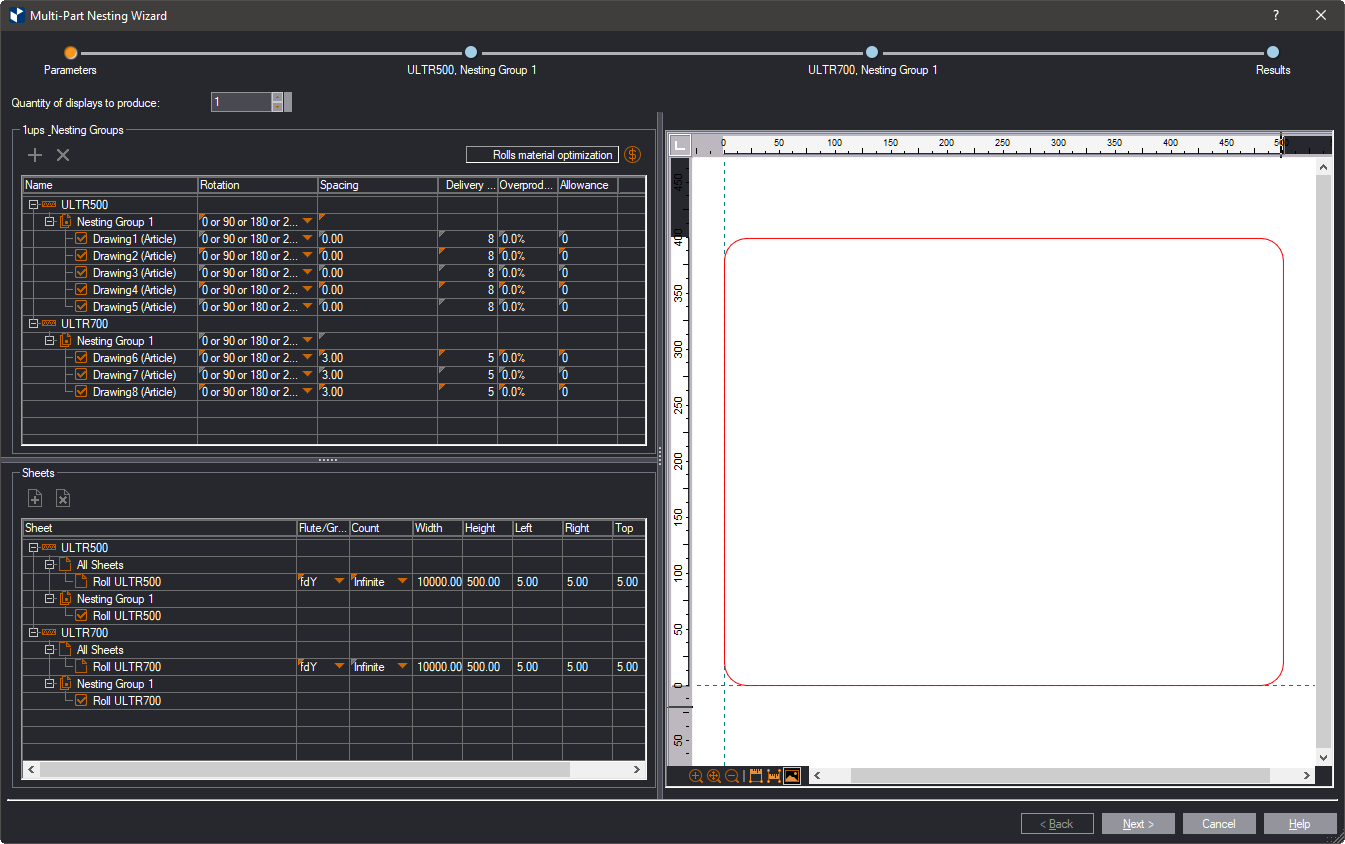
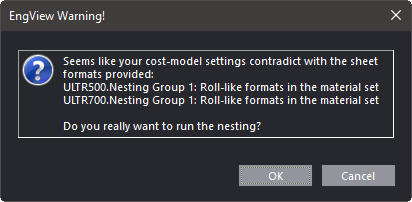
There are eight 1ups in the project. The first five use the ULTR500
material; the rest use the ULTR700 material.
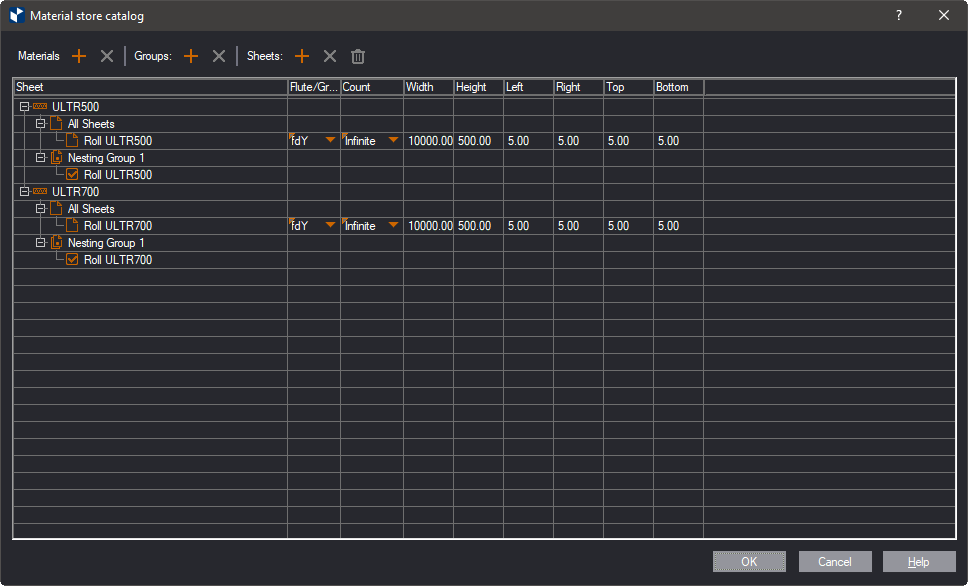
Also, it is well-advised to input this information into the Materials
Store Catalog. For the ULTR500 material, we set the Roll ULTR500 rolls;
for the ULTR700 material we set Roll ULTR700 rolls.
Notice that there is information about the
rolls that will be used for both nesting groups. This information
comes automatically from the Materials Store Catalog.
- Click Material and Tool Optimization
 .
A dialog box appears, where you set up EngView
to calculate nesting jobs on a rolled material.
.
A dialog box appears, where you set up EngView
to calculate nesting jobs on a rolled material.
The Cost Parameters dialog box appears.

- In Material type, select Roll (pictured above).
- In Min reusable roll length, type the minimum length
for EngView
to consider when saving the leftover material in the Materials
Store Catalog. For details about how leftover material is stored
and reused, see the notes for Remnant Sheet and Update
material store quantities at the last step
of the procedure.
- (Optional) In Recommended chunk size, type how long
you want chunks to be.
- Close the dialog box to return to the Parameters step.
Notice that the label has changed to alert
you that you are nesting on rolled material:
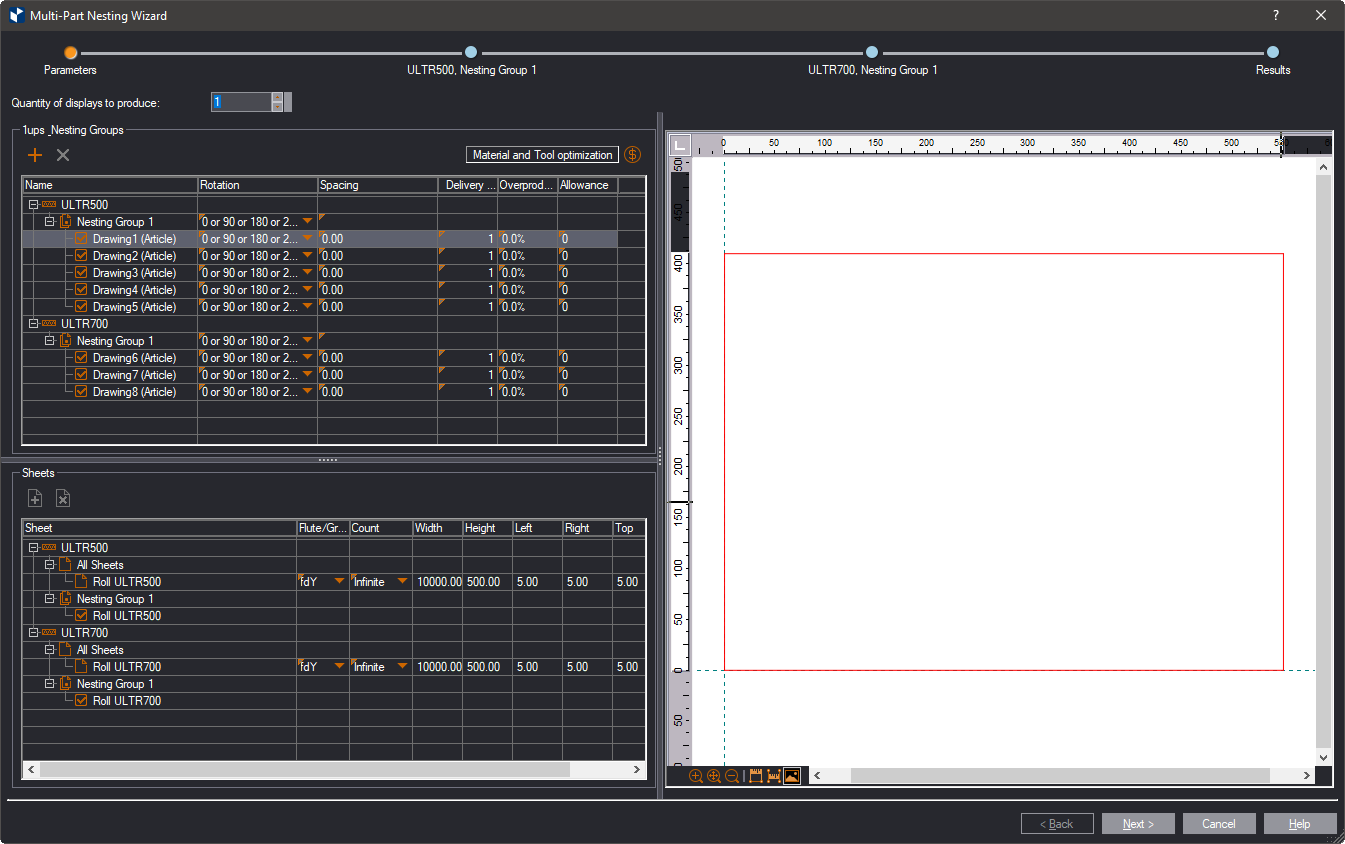
| The progress bar |
The progress bar, in the uppermost section, follows the course
of the nesting job. It covers a series steps whose number depends
on the type of the material used in the 3D model and the grouping
of the parts for the actual nesting. The first and last steps
— Parameters and Results — are permanent, while the number of
the intermediate steps depends on how many materials are used
and how many nesting group are defined (see below). The name of
an intermediate step is a compound generated automatically from
the name of the used material and that of the nesting group. In
the example above, ICB Board White 16, Nesting Group 1. Scroll
below in the table to learn how to use nesting groups. |
| |
| Quantity of displays to produce |
This box has no role in the nesting on rolled materials. |
| |
| 1up Nesting Groups |
Here you tell EngView
how to nest the parts. When you select a part, it appears in the
preview area on the right. If you have defined nesting groups
in the materials
store, based on a particular material, these are loaded automatically.
IMPORTANT: If you make changes to the nesting
groups that you want to use in the future, EngView
updates them for you in the materials
store.
Learn how to define a nesting group. |
| Cost Parameters |
Opens a dialog box in which
you set the method of how to calculate an estimate for the cost
of the production. |
| Name |
The column displays three nesting job components:
- The name of the used material. Material names are added
automatically by EngView
. This name takes part in the EngView
-generated name of the nesting job's intermediate steps. You
cannot edit the name here.
- The nesting groups defined for the job. Each material used
in the project defined its own set of nesting groups. There
is always a default group, Nesting Group 1, whose name you
cannot modify and cannot delete. You can tell EngView to always
nest certain parts together. In this case, you need to group
the parts into a separate group. To create a group:
- Select the name of the material.
- Click the Plus button above.A row appears for the new
nesting group.
- Edit its name as you need it.
- From Nesting Group 1, drag into the new group the parts
that you want to group individually in the new group.
- Repeat Steps 1–4 for each new group you choose to create.
- The indvidual parts that will take part in the nesting
job. By default, when you begin, you see all available parts
in Nesting Group 1. If you choose to have some parts always
nested together, create additional nesting groups. (See the
preceding note.) If you do not want to use a part in the nesting
job, leave its check box empty. Article indicates the
name of the article applied
onto the part.
|
| Rotation |
Type an angle that EngView
will use to rotate the part while populating the sheet. To specify
a value for all the parts, set it across the name of the nesting
group. To set an individual angle value for a part, set it across
the part's name. |
| Spacing |
A gap between the 1ups. To specify a global value, type it
across the name of the nesting group. To set an individual spacing
for part, type its value across the name of the part. |
| Delivery Quantity |
Specify how many pieces of this part you want produced. |
| Overproduction |
Not applicable for roll nesting. |
| Allowance |
Not applicable for roll nesting. |
| |
| Sheets |
The rolls that will be used in the nesting job. NOTE: To add
a roll, click any row in the table, and then click the Plus button;
then, from the list that appears, select the roll. To delete a
roll, click it, and then click the Remove button. |
| The rolls List |
A list of the rolls selected for production. For each material,
you see two default groups: All Sheets and Nesting Group 1. For
each new nesting group you create, a new rolls group appears here.
If you are working with multiple nesting groups, here you can
add rolls to each group. To add a roll:
- Select a group's name.
- Click the Plus button.
- From the list that appears, select the roll that you want
to work with.
- Repeat Steps 1–3 for each roll you want to add. Notice
that each roll you add automatically goes to both its own
nesting group and the All Sheets group.
|
| Flute/Grain direction |
Sets whether the roll will take into account the grain or flute
of the material. The options are:
- fdX. Arranges the parts according to the horizontal
flute/grain of the roll.
- fdY. Arranges the parts according to the horizontal
flute/grain of the roll.
- fdAny. Ignores the flute/grain direction.
|
| |
| Count |
Sets how many rolls you have on hand. The default value is
Infinite — if this roll is registered in the Materials
Store Catalog, it the count will come from there. This means unlimited
number of rolls. Overwrite it with a number that works for you. |
| Width |
Set how wide (long) your roll is. |
| Height |
Set how high (wide) your roll is. |
| Left, Right, Top, Bottom |
The values for the roll's left, right, upper and lower margins |
| |
| The Preview Pane |
A preview of the part selected in the Name column |
- Click Next to continue.
An intermediate step appears. The wizard
displays as many intermediate steps as there are materials and nesting
groups set up for the nesting job.
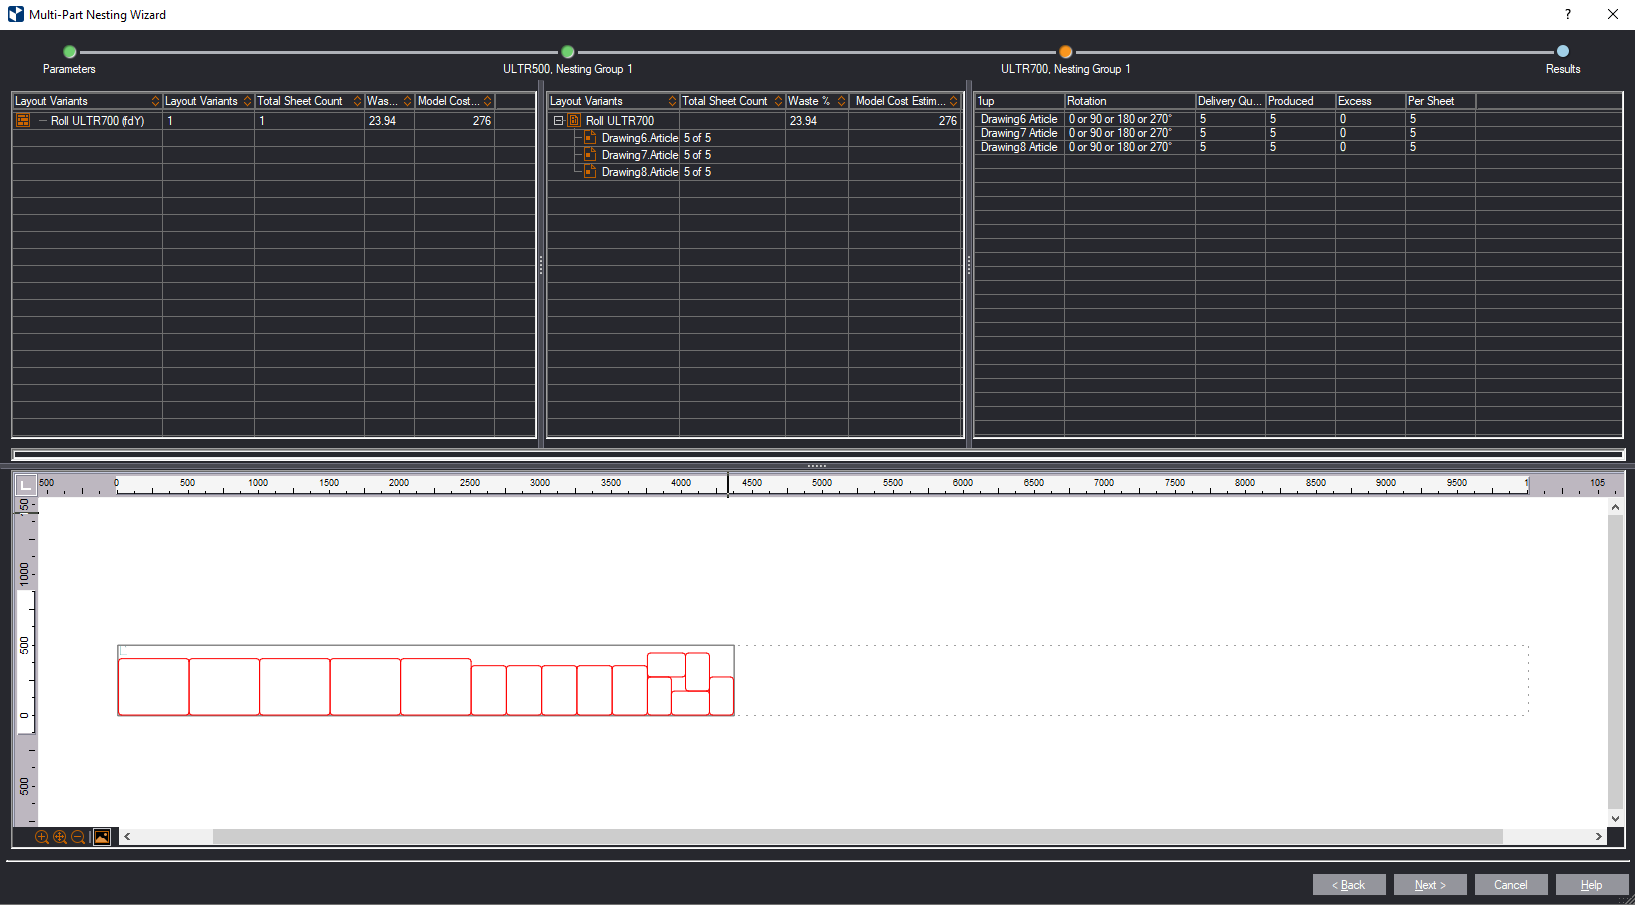
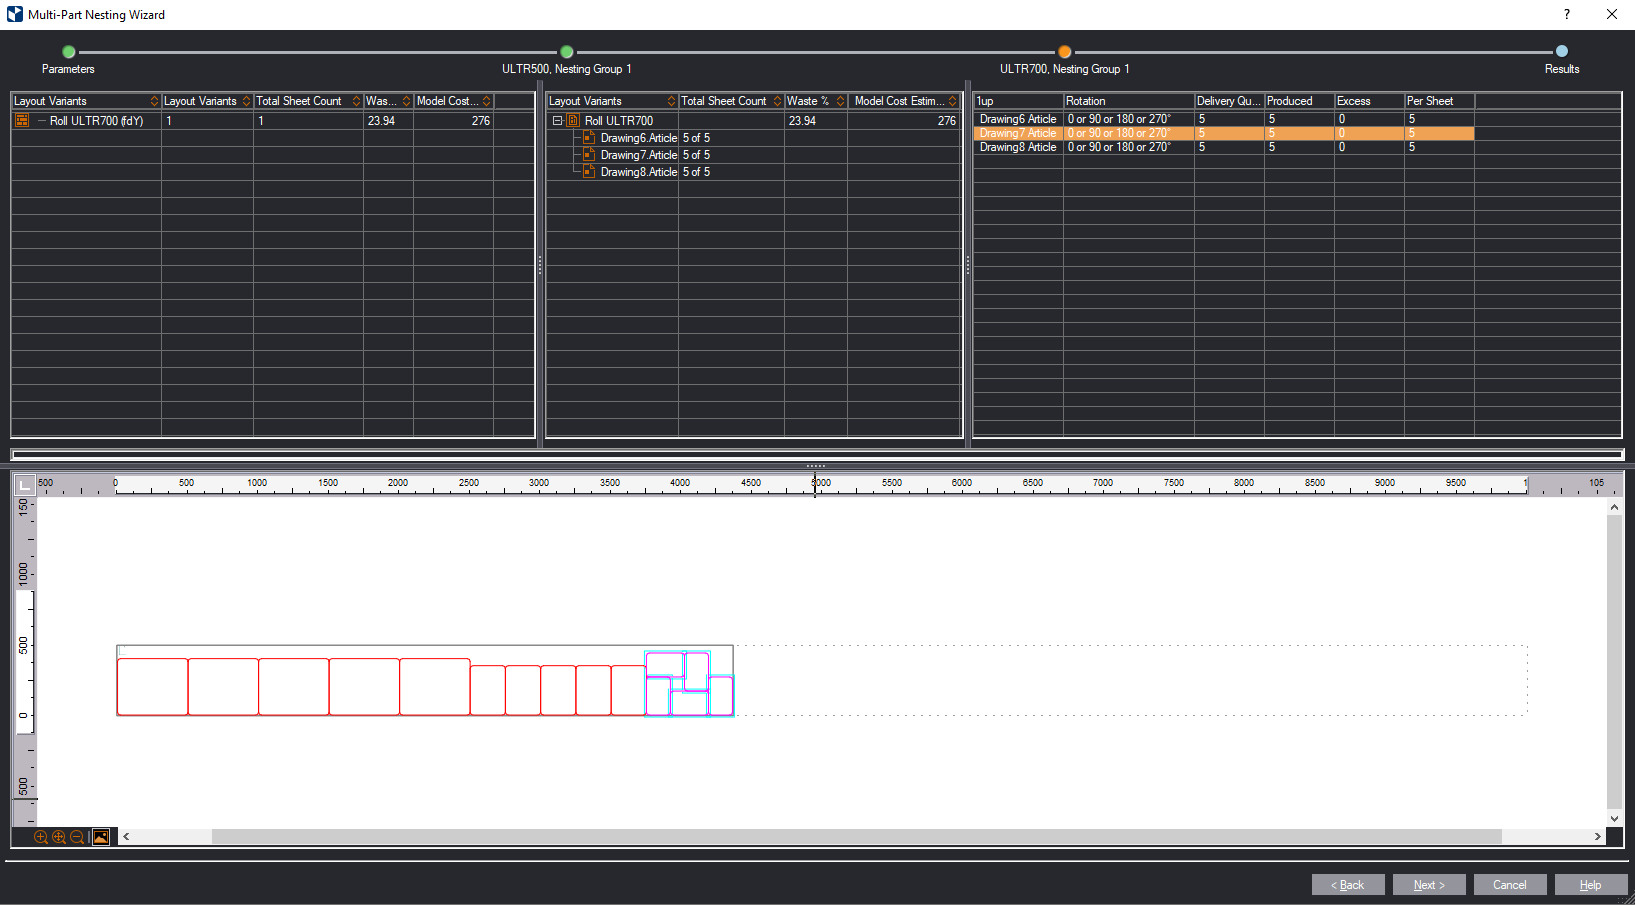
Roll nesting on materials ULTR500 and ULTR700 for nesting group
Nesting Group1. Тwo layouts are needed.
| The Left-Hand Pane |
|
| Layout Variants |
The names of the sheets that EngView
will use for the nesting job. |
| Layout Variants |
How many dies nestings the job requires. |
| Total Sheet Count |
The total number of sheets EngView
has computed for the nesting job. Note that if you see a red text
and an alert tooltip here, this means that in Count (in
the Parameters step) you have entered a number that is smaller
than the one EngView
has computed. This alert will not stop the nesting job, but if
you want to be correct, it is best to go back to the Parameters
step and modify the value in Count. |
| Waste % |
The overall waste in relation to the total area of the sheet |
| Model Cost Estimate |
The relative cost for the variant |
| |
| The Middle Pane |
This pane lists the information in the left-hand one but broken
down to chunks, not displayed by material. You see information
for each chunk you have selected in the left-handed pane. You
can see how many parts are nested on which individual roll or
chunk, as well as the waste and cost of the roll/chunk. |
| |
| The Right-Hand Pane |
The pane lists the parts of the nesting group. Selecting a
part here highlights it in the visualization pane below. |
| 1up |
The name of the part. When you select a part, it is highlighted
in the preview pane in all the sheets it appears. |
| Rotation |
The angle of rotation that EngView has applied for the part
when arrayed in the sheet |
| Delivery Quantity |
How many pieces of this part you want produced. If colored
results appear, see what they mean*. |
| Produced |
The number of parts the nesting job will actually produce.
NOTE: For roll nesting, the delivered and the produced quantities
are equal. If colored results appear, see what they mean*. |
| Excess |
In the context of roll nesting, excess is zero unless there
are sufficient number of rolls o roll remnants. When the set production
run cannot fit in the available rolls, this column lists the number
of parts that cannot be produced — that is, a negative number
appears. If colored results appear, see what they mean*. |
| Per Sheet |
Indicates how many pieces of the part there are in each sheet
in which the part appears. Examples:
- sh1:8 means Sheet 1 contains eight pieces of the part.
- sh1:4, sh2:4 means Sheet 1 contains four pieces of the
part and Sheet 2 contains four pieces of the part.
When you select the row, EngView
highlights the part in the preview pane in all the sheets it appears.
If colored results appear, see what they mean*. |
| *Colored results |
Depending on the amounts you have set for a nesting job, in
the right-hand pane you may see colored results in the columns
Delivery Quantity, Produced, Excess and Per Sheet. The colors
means as follows:
- Blue. The amounts
produced are greater than what you have set. That means you
will have surplus output.
- Red. The amounts produced
are smaller than what you have set. This means you will have
smaller output than what you need.
|
| |
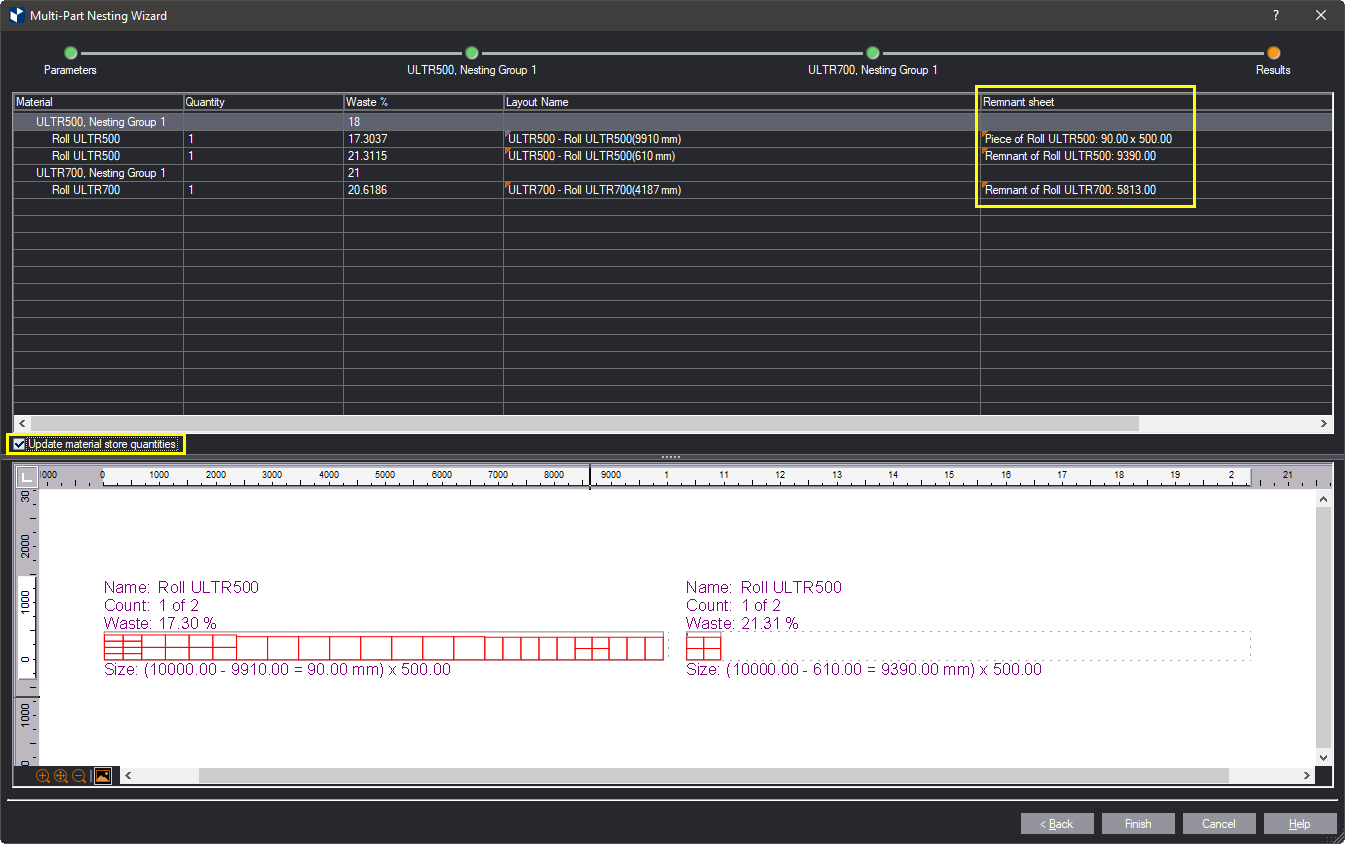
| The Preview Pane |
A preview of the nesting that EngView
has computed. Notice that the entire nested group is pushed to
the left side of the roll (its beginning), with the rest of the
roll being blank. After the variant goes to production, the leftover
portion will be stored
for future use under the name you have chosen in the Remnant
Sheet column in the tabular area (in the next step). |
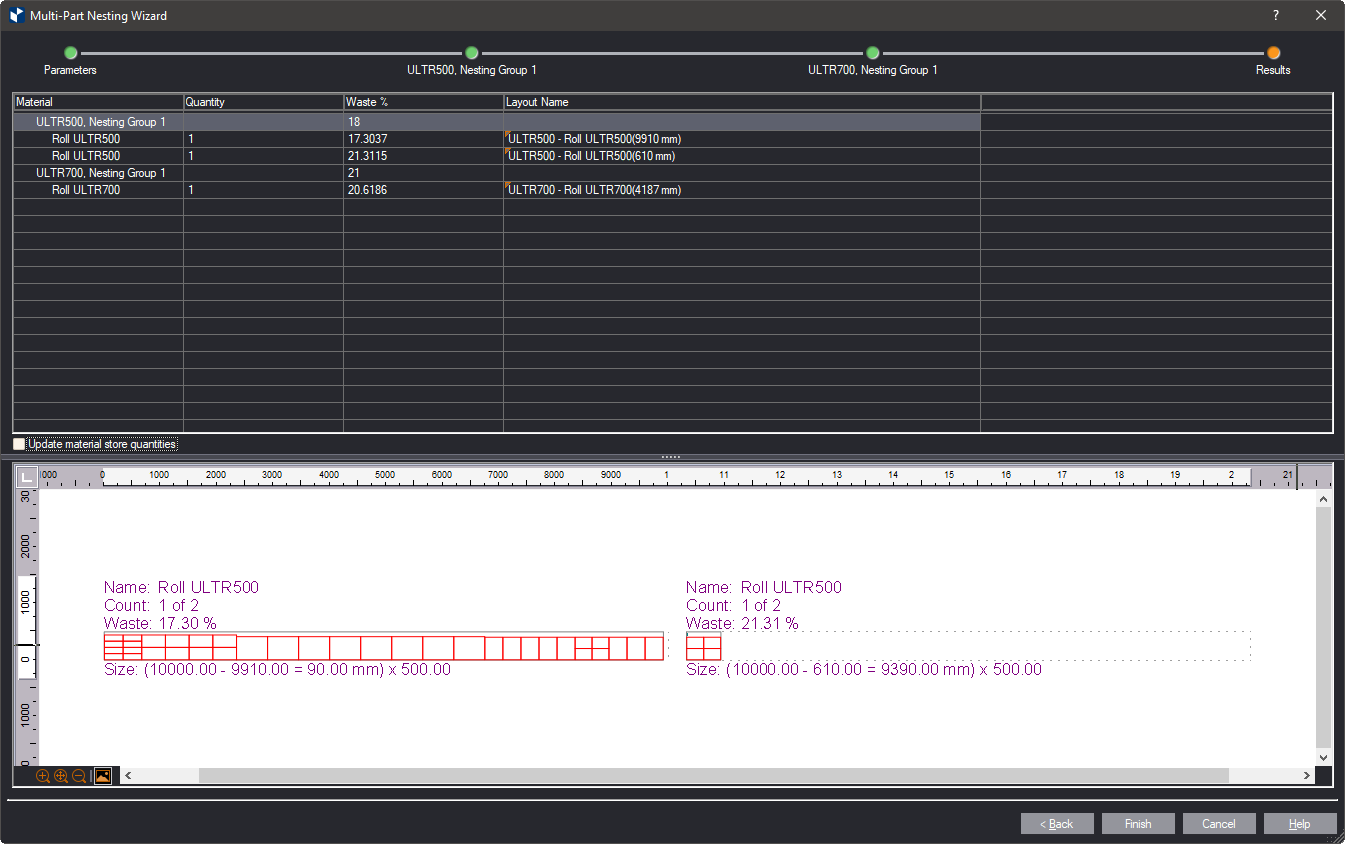
Two rolls are needed for cutting of parts in the ULTR500 material
in Nesting Group1. That is why there are two layouts. The first will
use 9910 mm from the roll; the second 610 mm.
One roll is needed for cutting of parts in the ULTR700 material
in Nesting Group 1. That is why there is one layout, which will use
4187 mm of the roll.
To update the Materials Store Catalog with the remnants of the used
rolls, select the Update materials store quantities check box.