


NOTE: Cloning an appearance is an effort-saving technique with which you define an appearance by modifying the settings of an existing one: In the list, select an appearance, click Clone, edit the settings, and then save them under a new name.
Learn how you can define your own imprint (embossing or debossing) appearance and add it to your processes library.
To set an imprint appearance
The Imprint Appearances dialog box appears.
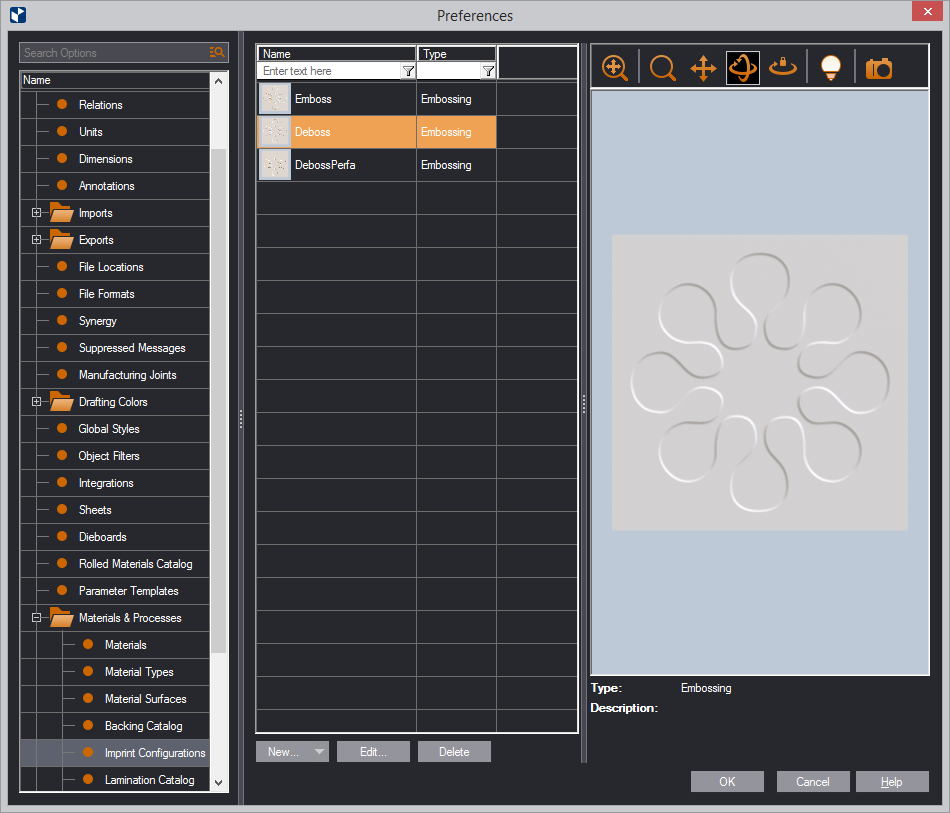
| Icon | Control Name | What It Does |
|---|---|---|
| Name | Name of the appearance | |
| Type | Type of the appearance | |
|
Fit | Fits the appearance model into the preview area. |
|
Zoom | Starts zooming inside the preview area. |
|
Pan | Starts moving the appearance model across the preview area. |
|
Turn | Starts rotating the appearance model in the preview area. |
|
Single Axis Rotation | Starts rotating the appearance model along the axis defined by how you move the mouse. |
|
View Options | Opens a dialog box in which you can set how the appearance model is lit in the preview area. |
|
Make a Snapshot | Makes a snapshot of the appearance model in the preview area. This snapshot then automatically appears as an icon for the appearance in the catalog list. |
| New/Clone | Opens a dialog box in which you can define the properties of
the shape: the front and rear edges and their heights.
NOTE: Cloning an appearance is an effort-saving technique with which you define an appearance by modifying the settings of an existing one: In the list, select an appearance, click Clone, edit the settings, and then save them under a new name. |
|
| Edit | Opens a dialog box in which you can edit the properties of the shape: the front and rear edges and their heights. | |
| Delete | Deletes the appearance that you have selected in the list. | |
The New Surface dialog box appears.
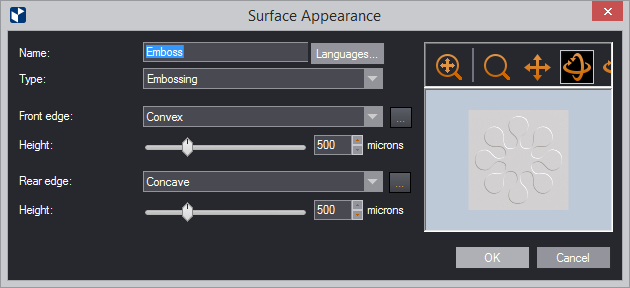
| Name | Name of the appearance |
|---|---|
| Type | Type of the appearance: emboss or deboss |
| Front, rear edge | Sets how the edge shape will be offset from the panel's surface
— flat (level with the panel), convex or concave. You can:
|
| Height | Sets the offset distance — that is, the distance by which the shape will rise above the panel's surface or sink below it. |
The new appearance now appears in the list.