When working with the processes Partial Foil Stamping and Monochrome Print, which involve the use of colors in separate color-carrying layers, in each such layer you can change the color directly in Illustrator.
To change the color of in color-carrying layers for Partial Foil Stamping and Monochrome Print
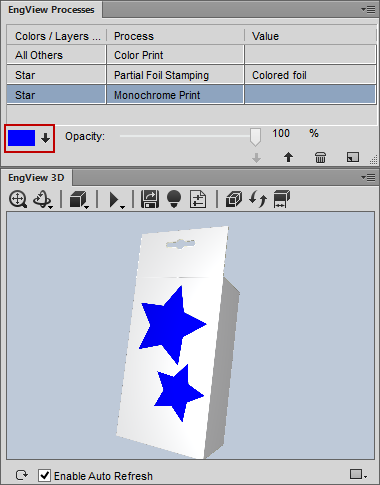
A small rectangle appears in the panel's lower left area, to the left of Thickness (for Partial Foil Stamping) or Opacity (for Monochrome Print). The rectangle is colored in the color currently applied to the color-carrying layer (pictured).
The two blue stars are placed in a layer treated with the Monochrome Print process. You can change their color with two clicks in the EngView Process panel.
NOTE: If you select Partial Foil Stamping, go to Step 4; if you choose Monochrome Print, go to Step 5.