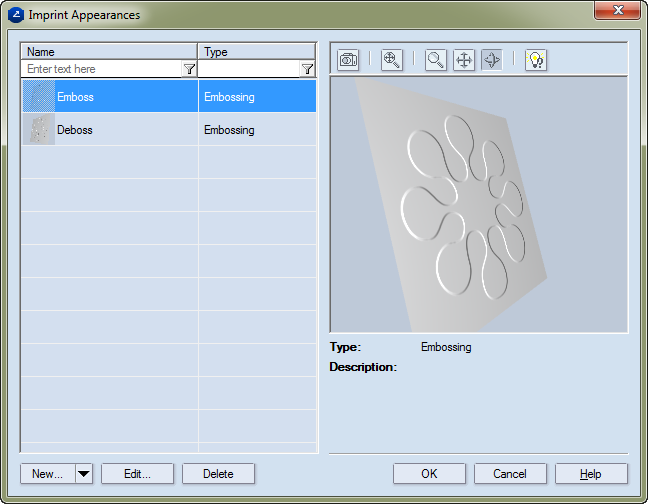
Imprint effects refer to the effects embossing and debossing. See how to create and manage these effects.
Creating embossing effects
The Imprint Appearances dialog box appears.
NOTE: If you need to edit an existing imprint effect, select it in the table, and then click Edit. Then, in the Surface Appearance dialog box, edit the settings.
The New Surface dialog box appears.
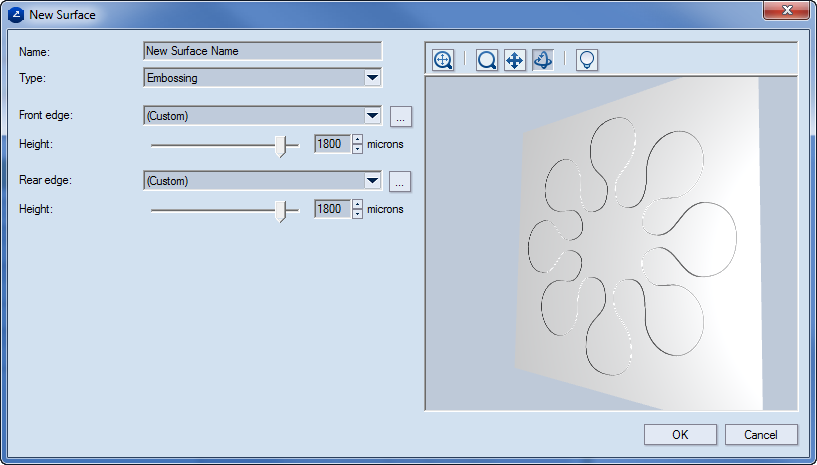
Name The name of the embossing appearance.
Type The type of the appearance: embossing or debossing.
Front edge Sets
the front edge of the appearance. To set the front edge appearance, click
the browse button  , and then,
in the dialog box that appears, edit the properties as you want them to
be. For details, see Step 3.
, and then,
in the dialog box that appears, edit the properties as you want them to
be. For details, see Step 3.
Height Sets the height of the front edge relative to the main surface.
Rear edge Sets
the rear edge of the appearance. To set the front edge appearance, click
the browse button , and then,
in the dialog box that appears, edit the properties. For details, see
Step 3.
Height Sets the height of the rear edge appearance relative to the main surface.
Editing the bump shape of the imprint appearance
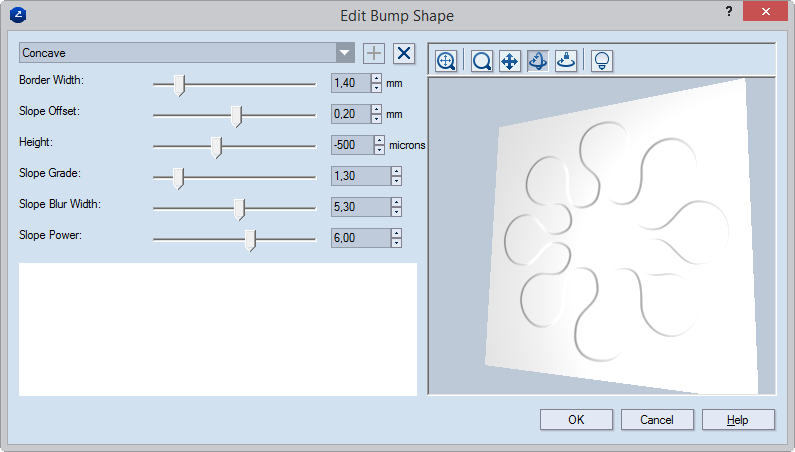
 Click to add a new bump
shape type.
Click to add a new bump
shape type.
 Click to remove
the selected bump shape type.
Click to remove
the selected bump shape type.
 Fit
Makes the design in the graphical area fit the current size of the area.
Fit
Makes the design in the graphical area fit the current size of the area.
 Zoom
Launches the zooming mode for the graphical area.
Zoom
Launches the zooming mode for the graphical area.
 Pan
Launches the pan mode, in which you can move the design horizontally across
the graphical area.
Pan
Launches the pan mode, in which you can move the design horizontally across
the graphical area.
 Turn
Launches the turn mode, in which you can rotate the design.
Turn
Launches the turn mode, in which you can rotate the design.
 Scene settings Opens a dialog
box in which you can set the visual properties of the 3D scene.
Scene settings Opens a dialog
box in which you can set the visual properties of the 3D scene.
Presets list A list of predefined sets of settings for particular imprint appearances.
Border Width Sets the absolute width for the border profile.
Slope Offset
Height Sets Sets the absolute height of the embossing effect.
Slope Grade Sets the angle at which the embossing is shaped off the surface.
Slope Blur Width
Slope Power