 .
.To adjust the bleed in the layout
.In the layout, the layout 1ups appear dimmed, and the selected one appears outlined by the bleed, displaying the markings — cross points and squares — where bleed adjustment can be done.
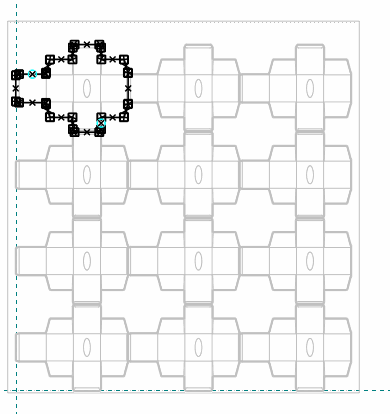
TECHNICAL NOTE: Bleed contour modification takes place when you click a marking and then drag it in the direction you need. If you need to transform the available lines and markings, further modifications are available: (1) For squares, pressing SHIFT + mouse click removes the square and merges the two lines that it links into a single line; (2) for cross points, pressing SHIFT + mouse click breaks up the line into two and turns the cross point into a square.
 .
.The layout appears again; the layout 1up remains selected.
 .
.