To create
a custom toolbar
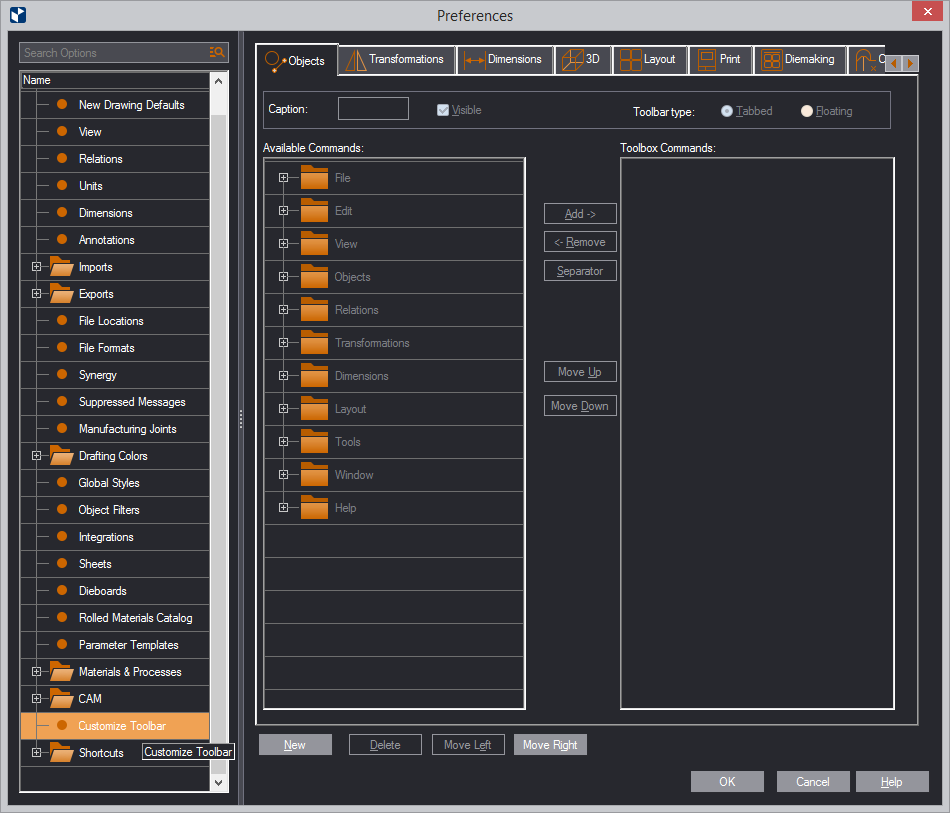
- On the Tools menu, click Preferences, and then click
Customize Toolbar.
The Toolbars section opens, displaying all
the toolbars as are available in your installation, as well as the
commands on each toolbar.
- Click New to start designing your new toolbar.
- In Caption, type a name for your new toolbar. In Toolbar
type, click an option to make the new toolbar tabbed or floating.
- Select the Visible check box to make the toolbox visible.
- Under Available Commands, click the plus symbol next to a menu
node to expand it and see its commands.
- Select command that you want to put onto the new toolbar, and
then click Add.
- Repeat Step 5 for each command that you want to have on the
new toolbar.
The set of commands for the new toolbar appear
under Toolbox Commands.
- (Optional) Use the Separator, Move Up and Move Down buttons
to arrange the commands in groups within the new toolbar.
- (Optional) Use the Move Left and Move Right buttons to position
the new toolbar in relation to the rest of the toolbars.
top of page
To edit a custom
toolbar
- On the Tools menu, click Preferences, and then click
Customize Toolbar.
- In the section, make the changes you need. (For details, see
the previous procedure.)
top of page
To delete
a custom toolbar
- On the Tools menu, click Preferences, and then click
Customize Toolbar.
- Open the custom toolbar that you want to delete.
- Click Delete.
top of page