Applying, removing print mark templates
Your installation comes with six default print
mark template:
- Center Marks, which places four print marks, in the midpoints on
the four sides of the cut box.
- Crop Marks, which places four print marks, at the corners of the
cut box.
- Japanese Marks, which places nine print marks along the cut box:
four at the corners; four at the midpoints; and at the point of intersections
of the cut box's diagonals.
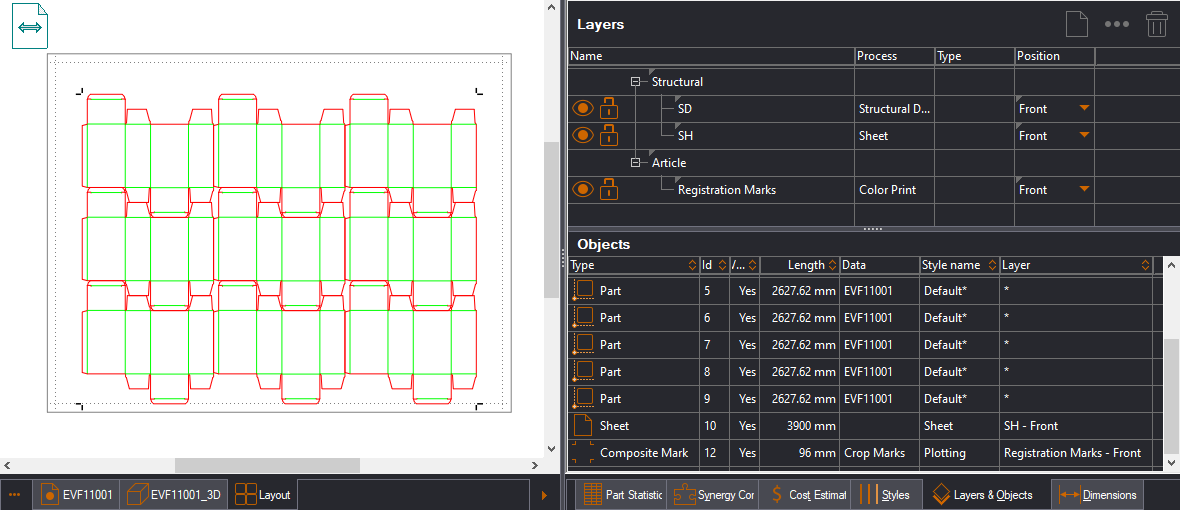
- Registration Marks, which places four 6-mm-wide circles, whose
centers are offset at 8 mm off the cut box.
- Registration Square Marks, which places four 6-mm squares, whose
centers are offset at 8 mm off the cut box.
- Sheet Gripper Marks, consisting of two print marks for the gripper
in the lower part of the placed sheet.
Applying a template Removing a template
Applying print templates
You can apply print marks on 1up and layout
drawings.
To apply a print mark template
- With your 1up or layout drawing open, on the Layout toolbar, click
Apply Template Print Mark
 .
.
A contextual edit bar appears above the graphical
area.
- In the contextual edit bar, in Template, select the template
that you want apply.
The template's print marks appear around the design.
- To position the selected print mark template, click anywhere in
the graphical area.
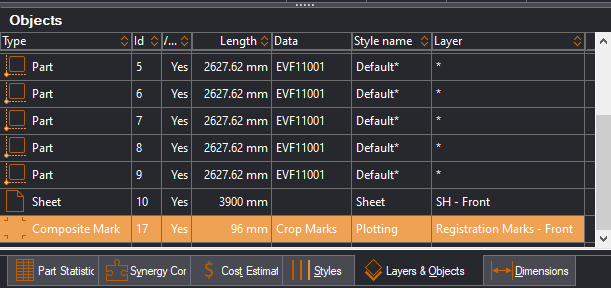
A Composite Mark object appears in the Layers &
Objects list in the tabular area.
The procedure ends with assigning the print marks
to their own layer (see Steps 3 and 4). If print marks were send to a
layer when they were created,
save the file, and skip Steps 3 and 4.
- In the tabular area, create a
layer to which you will assign the print marks.
- Select the print marks, and then assign
them to the newly created layer.
NOTE: Assigning the print marks to their own layer is a
practice that comes in handy in pre-production-related tasks. For example,
when working with the Illustrator integration, you may need to hide the
print marks to prevent them from appearing on the final product. When
they are assigned to their own layer, switching them off is easy in Illustrator's
Layers panel.
Removing templates
In the graphical area
- Select any print mark. This automatically selects all the print
marks.
- Do any of the following:
- Press CTRL+DEL.
- Right-click the print mark, and then click Delete.
In the tabular area
In the tabular area, print mark templates appear
as a single object, named Composite Mark.
- In the Layers & Objects tab, select the print mark object
row.
- Do any of the following:
- Press DELETE.
- Right-click, and then click Delete on the context menu.